Recuerdo cuando en este 2024 salió la famosa tendencia ''Coquette'' donde todo tenía que ver con lazos, detalles con encaje, volantes y abombados, realmente no le preste mucha atención ya que consideraba era un tendencia que pasaría pronto, pero cuando todo este tema paso a ser parte de las decoraciones de torta me enamoré por completo. La verdad nunca imaginé que llegaría a decorar una torta de esta manera, hasta el día de hoy, donde justo llegó al emprendimiento que tengo junto a mi mamá un pedido de una torta decorada con este tendencia y bueno, como algunos saben, en el emprendimiento soy yo quien se encarga de decorar las tortas así que los nervios y emoción no se hicieron esperar.
Si les soy sincera, este tema de decorados y demás es algo que aún me falta aprender mucho ya que en mi carrera solo fue un módulo el que di referente a esto, sin embargo, es un tema que me encanta y que me he dedicado a practicar cada que tengo la oportunidad, por lo que bueno, aunque estoy consciente de que esto es de un constante aprendizaje y mejoramiento, hoy les compartiré la manera en que decoré esta linda torta.
I remember when in this 2024 year came out the famous trend ''Coquette'' where everything had to do with bows, lace details, ruffles and puffy, I really did not pay much attention because I thought it was a trend that would pass soon, but when all this theme became part of the cake decorations I fell in love completely. The truth is that I never imagined that I would decorate a cake in this way, until today, where just arrived to the enterprise that I have with my mom an order for a cake decorated with this trend and well, as some know, in the enterprise I am the one in charge of decorating the cakes so the nerves and excitement were not long in coming.
If I am honest, this topic of decorations and others is something that I still have a lot to learn because in my career there was only one module that I taught about this, however, it is a topic that I love and that I have dedicated myself to practice whenever I have the opportunity, so well, although I am aware that this is a constant learning and improvement, today I will share with you the way I decorated this beautiful cake.

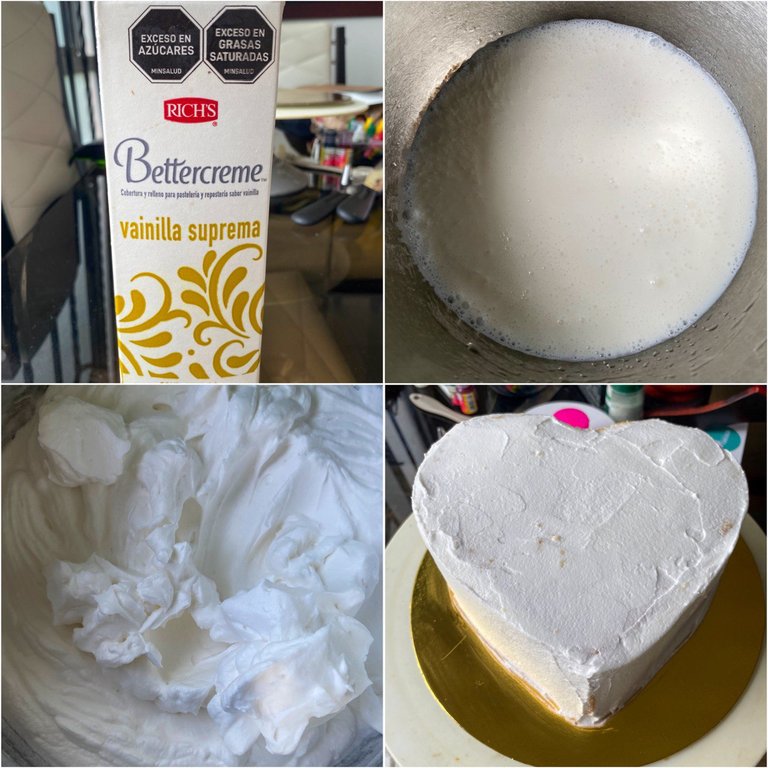
Una vez el bizcocho estuvo listo, que es la parte de la que se encarga mi mamá, dejamos que reposara, lo cubrimos muy bien con papel film y llevamos a refrigerar para así proceder a preparar la capa recoge miga, en este caso estuve trabajando con la crema de Bettercreme sabor a vainilla que realmente me gusta mucho y se me hace bastante fácil a la hora de trabajarla, sin embargo, me gustaría probar con otro tipo de cobertura a ver de cual quedo totalmente enamorada.
Lo primero fue batir muy bien la bettercreme antes de abrir y verter un poco en el bol de la batidora que estaba previamente guardado en el refrigerador junto con las aspas para un mejor trabajo de la crema, luego de esto, la idea es batir hasta que se forme una crema con una consistencia ni muy aguada ni muy sobre batida, la manera correcta de verificar es que al momento de alzar las aspas se formen picos que se mantengan.
Once the cake was ready, which is the part that my mom is in charge of, we let it rest, cover it well with plastic wrap and take it to refrigerate and proceed to prepare the crumb topping, in this case I was working with Bettercreme cream vanilla flavor that I really like a lot and it is quite easy to work with, however, I would like to try another type of topping to see which one I fall in love with.
The first thing was to beat the Bettercreme very well before opening and pour a little in the mixer bowl that was previously stored in the refrigerator along with the blades for a better work of the cream, after this, the idea is to beat until a cream is formed with a consistency neither too watery nor too over whipped, the correct way to verify is that when the blades are lifted peaks are formed that are maintained.
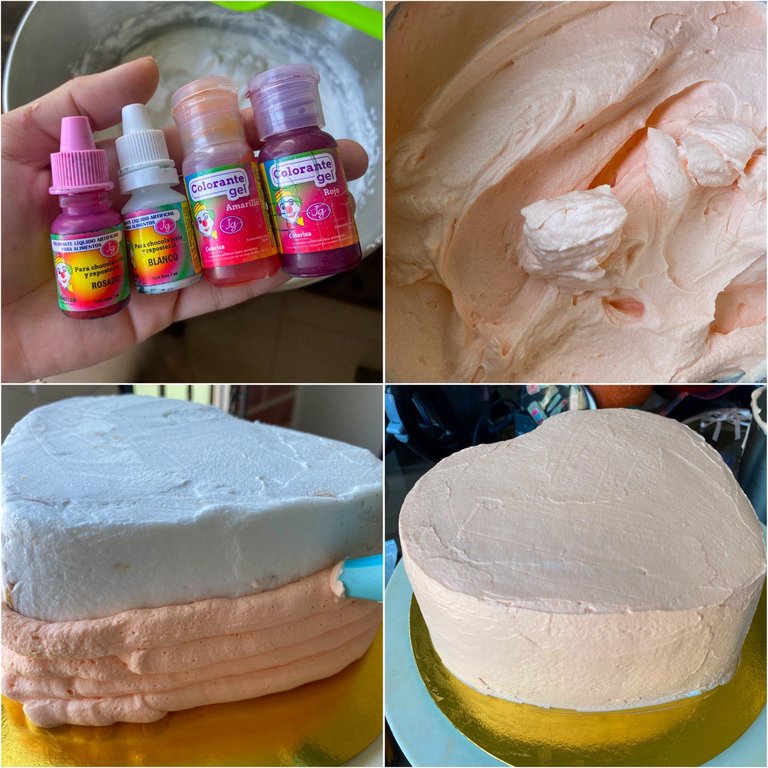
Una vez la capa recoge miga estuviera lista, volví a cubrir la torta con papel film y lleve a la nevera para que se mantuviera fresca durante toda la noche. Ahora bien, para decorar como tal la torta lo primero fue darle el color deseado a la crema, en este caso use varios colorantes en gel, entre esos los colores rosado, amarillo, rojo y blanco, dando como resultado un color coral pastel muy lindo.
Procedí a forrar la torta con la crema y con ayuda de una manga pastelera para luego alisarla muy bien con una espátula, claramente no me quedó tan perfecto el tema del alisado, sin embargo, en este caso el decorado final me ayudó a disimularlo un poco.
Once the crumb topping was ready, I covered the cake again with plastic wrap and took it to the refrigerator to keep it cool overnight. Now, to decorate the cake as such, the first thing to do was to give the desired color to the cream, in this case I used several coloring gels, including pink, yellow, red and white, resulting in a very nice pastel coral color.
I proceeded to line the cake with the cream and with the help of a piping bag and then smooth it very well with a spatula, clearly I was not so perfect on the issue of smoothing, however, in this case the final decoration helped me to hide it a little.
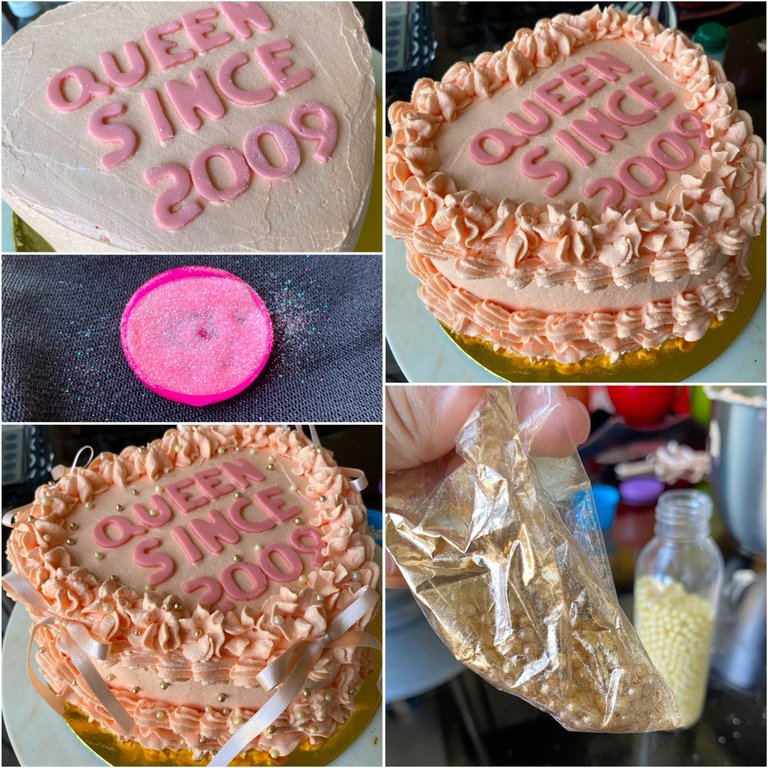
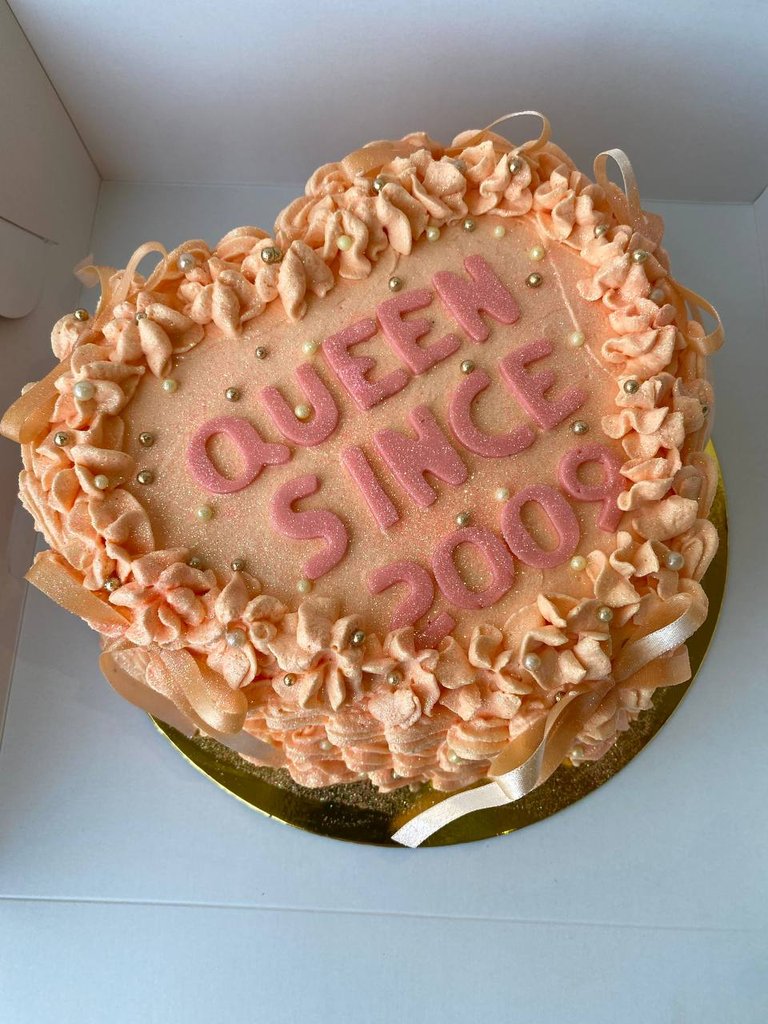
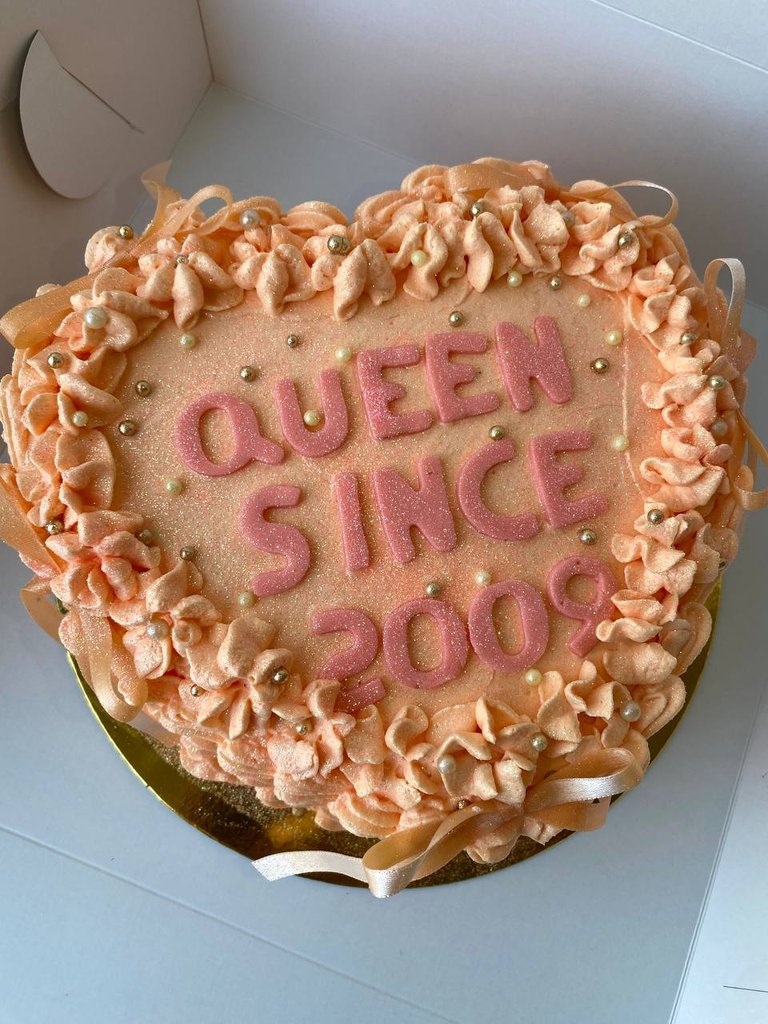
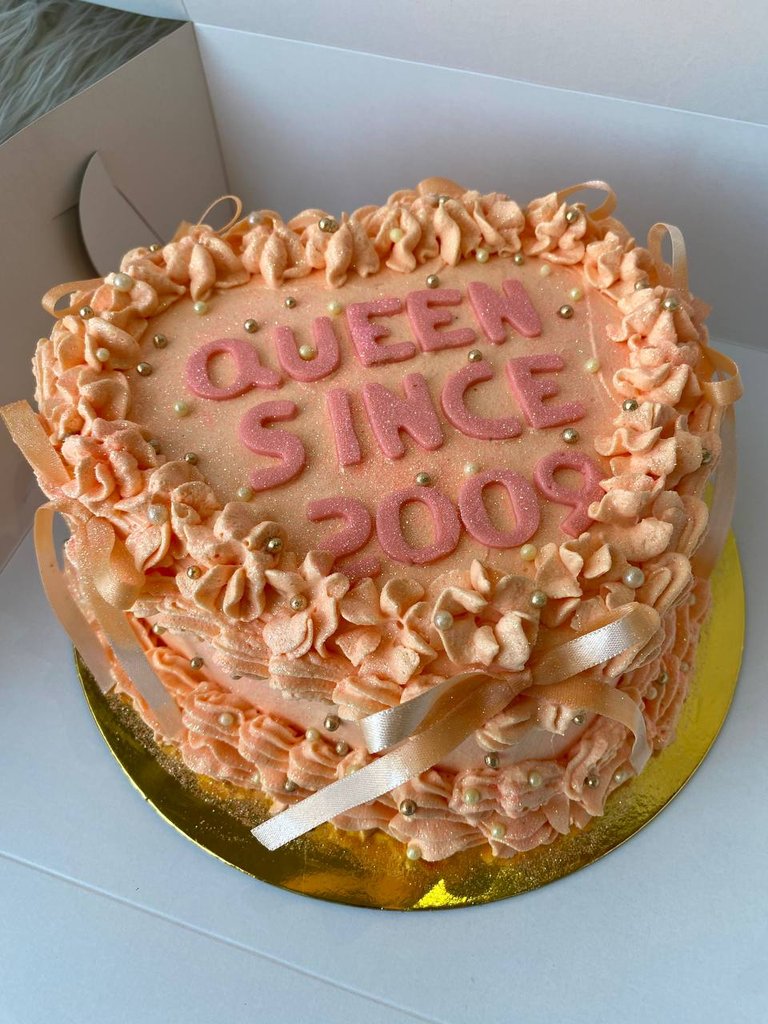
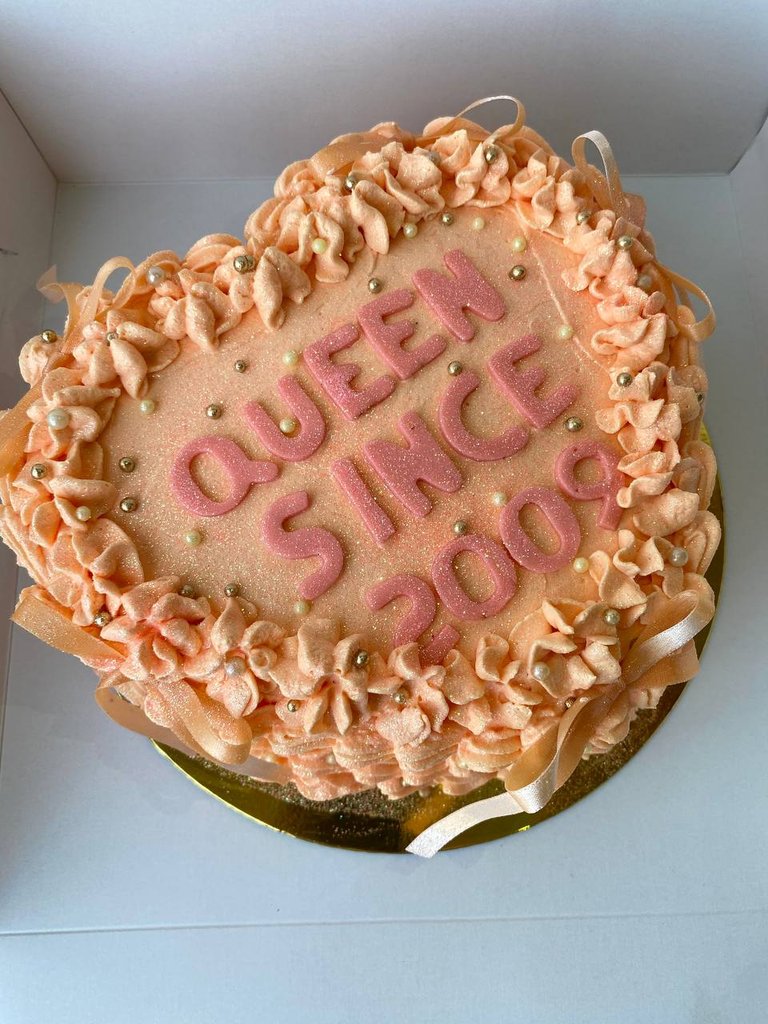
Antes de empezar a realizar los bordes que ayudarían a darle vida a la torta decidí pegar las letras con la frase ''Queen since 2009'' las cuales realizamos en fondant, ahora si, una vez que las letras estuvieron bien acomodadas procedí a realizar los bordes con ayuda de una manga pastelera y una boquilla 1M y una pequeña #30.
La decoración de esta torta llevaba algunas perlas doradas pero al no tener me toco improvisar un poco, así que este es un pequeño tip que les comparto por aquí, como las perlas que tenía eran en color marfil metí unas cuantas en una bolsa con un poco de polvo dorado y las sacudí muy bien para que se impregnaran con el color, se puede hacer con cualquier color de perlas que tengas y desees darle ese color dorado. Las esparcí muy bien por toda la torta, le coloque con mucho cuidado los pequeños lazos que hice con cinta de tela y para finalizar le añadí brillantina comestible en tono rosas y murano.
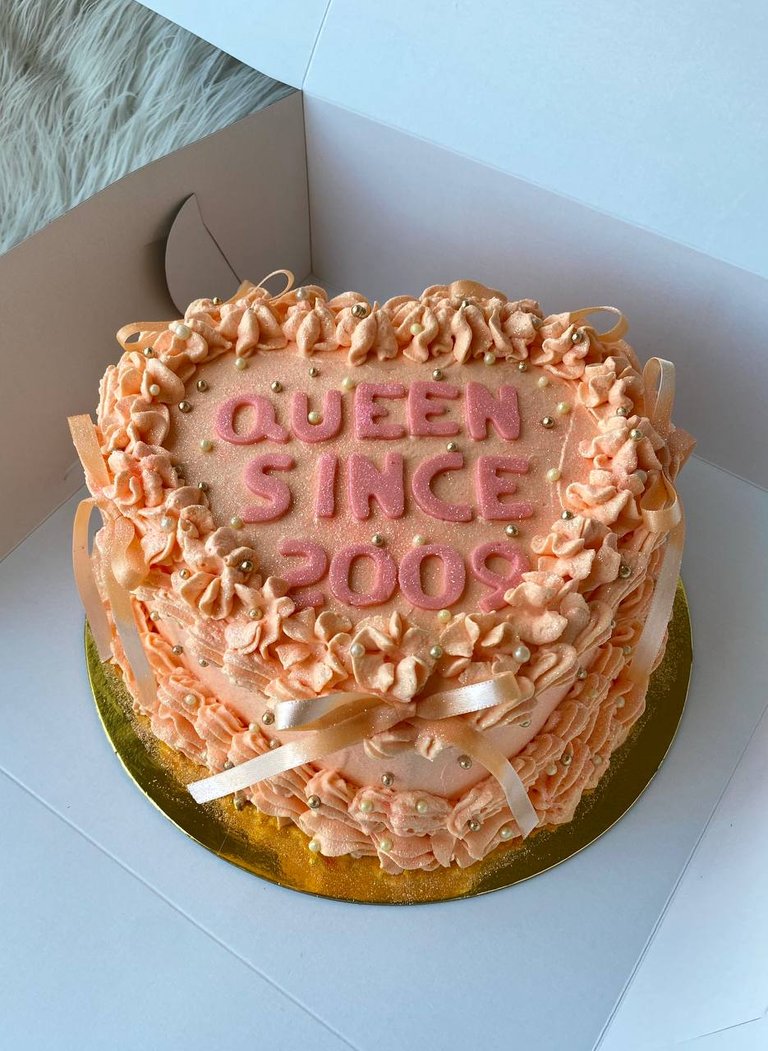
Before starting to make the borders that would help to give life to the cake I decided to glue the letters with the phrase ''Queen since 2009'' which we made in fondant, now yes, once the letters were well arranged I proceeded to make the edges with the help of a piping bag and a 1M nozzle and a small #30.
The decoration of this cake had some golden pearls but not having them I had to improvise a little, so this is a little tip that I share here, as the pearls I had were in ivory color I put a few in a bag with a little gold powder and shook them well so that they were impregnated with the color, you can do it with any color of pearls you have and want to give that golden color. I spread them very well all over the cake, I carefully placed the small bows I made with fabric ribbon and finally I added edible glitter in pink and murano tones.
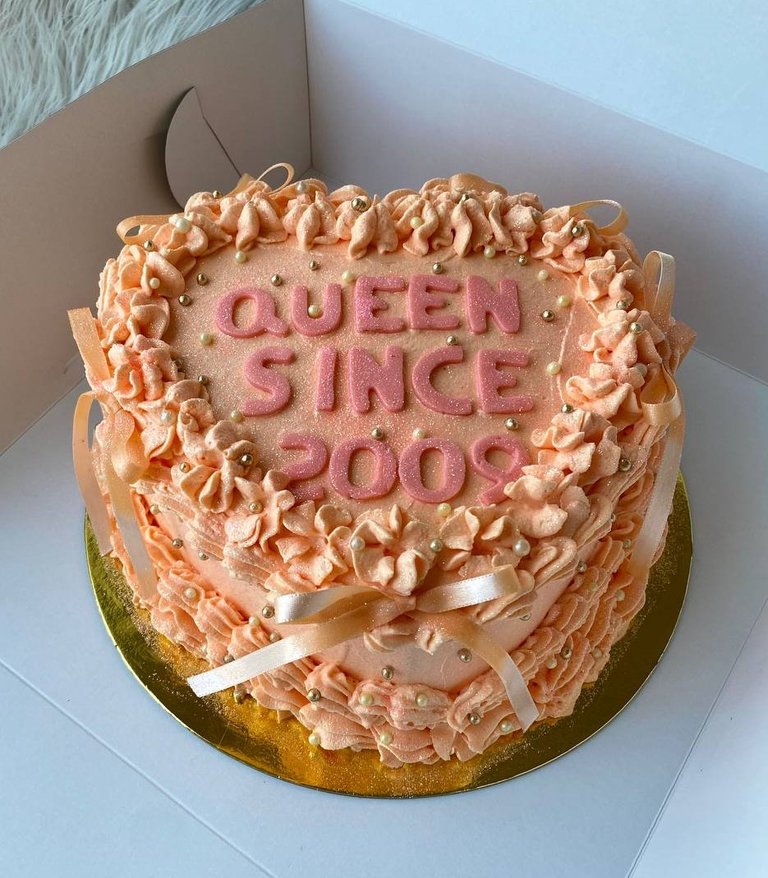
De esta manera quedó una linda torta con tendencia Coquette, la verdad me encantó el resultado, desde el color de la torta hasta cada uno de sus detalles, me parece que este tipo de decoración es bastante romántico y hermoso. La idea de la brillantina me aterraba un poco ya que no contaba con la herramienta necesaria, sin embargo, siempre es bueno ingeniárselas y en este caso eso fue lo que hice. Por otro lado, como les comentaba arriba, me encantaría probar con otro tipo de cobertura ya que el clima de mi ciudad no es que colabore mucho, así que estoy más que dispuesta a recibir sugerencias. Sin más, espero les haya gustado el resultado tanto como a mi amigos. Nos leemos en una próxima. Un abrazo ❤️
The result is a beautiful cake with a Coquette trend. I really loved the result, from the color of the cake to each of its details, I think that this type of decoration is quite romantic and beautiful. The idea of glitter terrified me a little because I didn't have the necessary tool, however, it's always good to make it up and in this case that's what I did. On the other hand, as I mentioned above, I would love to try another type of covering since the weather in my city is not very cooperative, so I am more than willing to receive suggestions. Without further ado, I hope you liked the result as much as my friends did. See you in the next one. A hug❤️
Separador de texto creado por | Text separator
Texto traducido en | Text translated in: Deepl
Imagenes tomadas por mi | Images taken by me