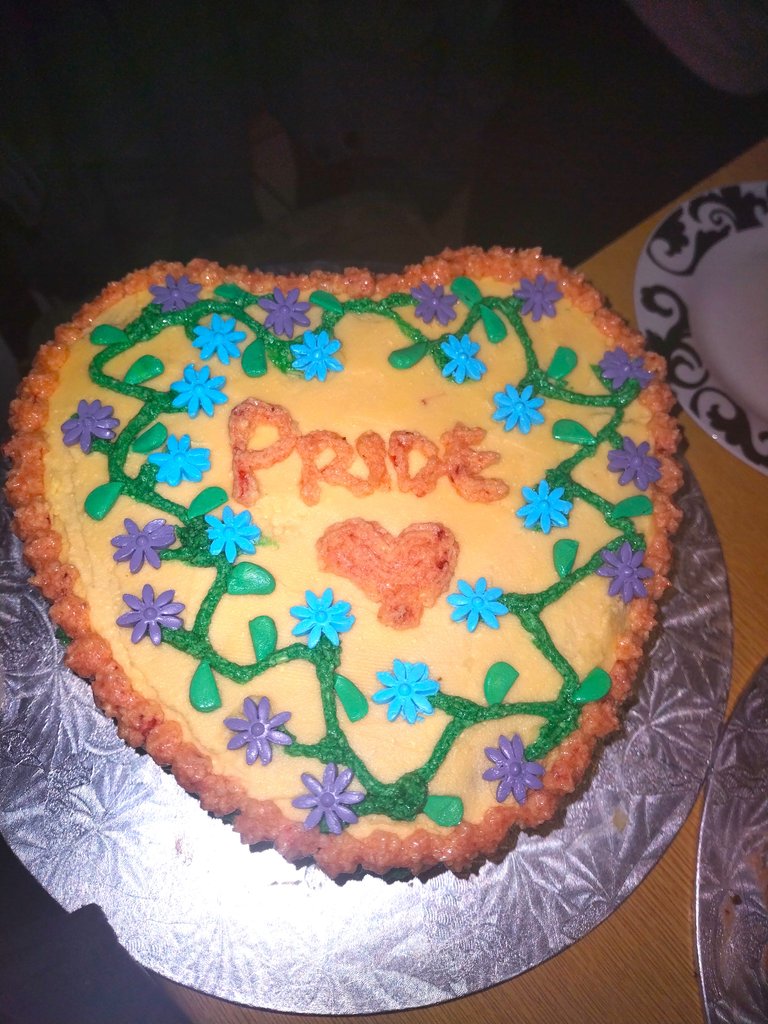
Well this was a total learning curve for me! I received brand new baking tins from @loadreaper and I've been dying to dry out the heart shaped tin. And what better excuse than for International Pride month?
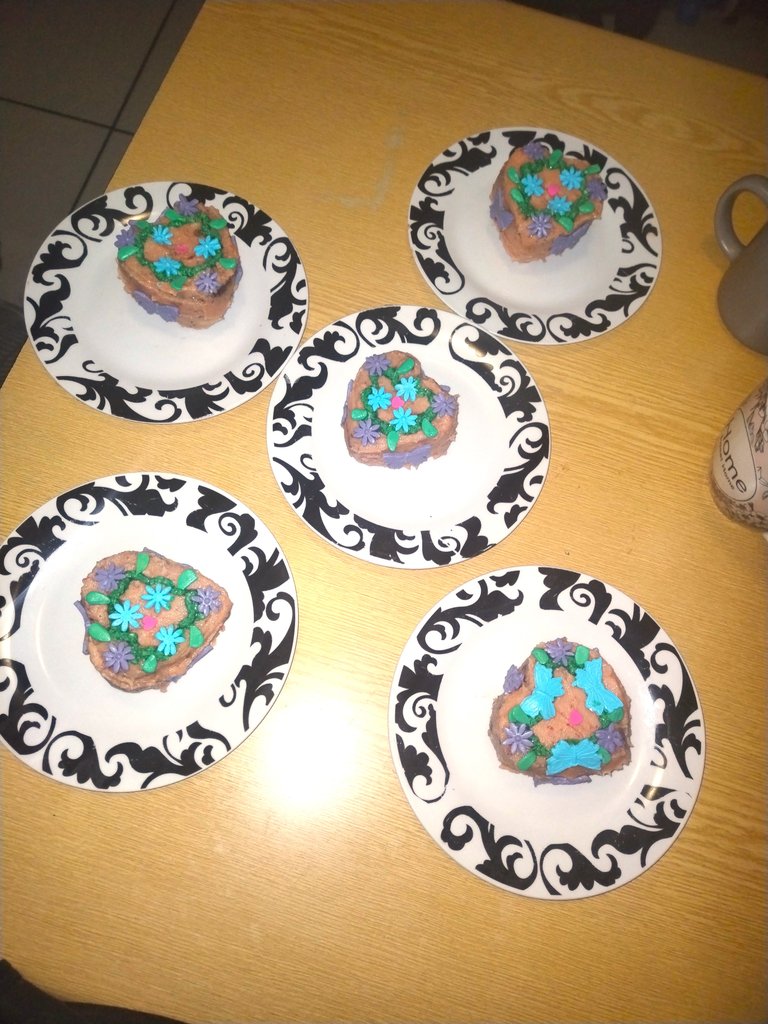
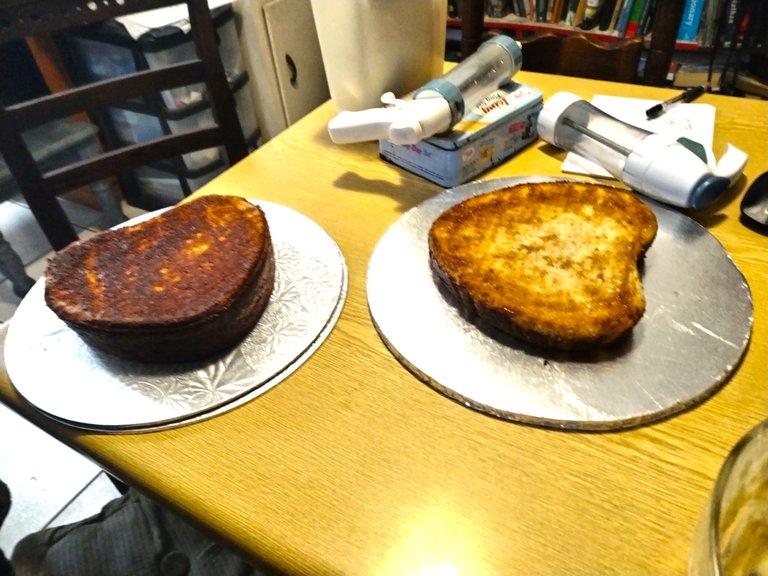
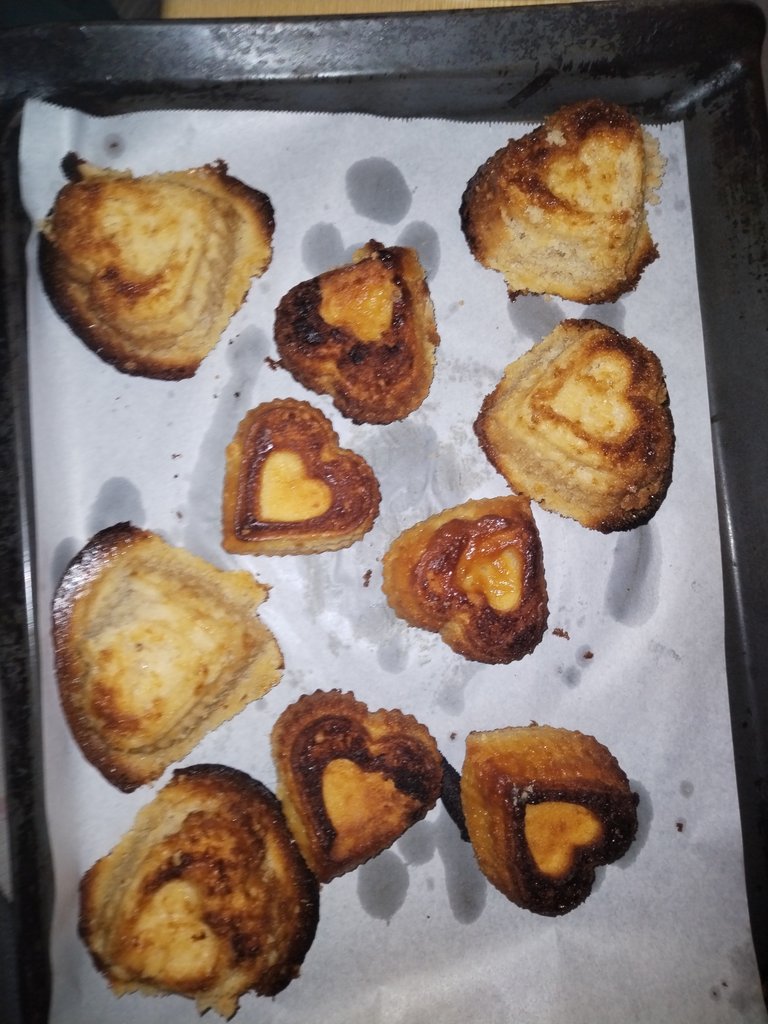
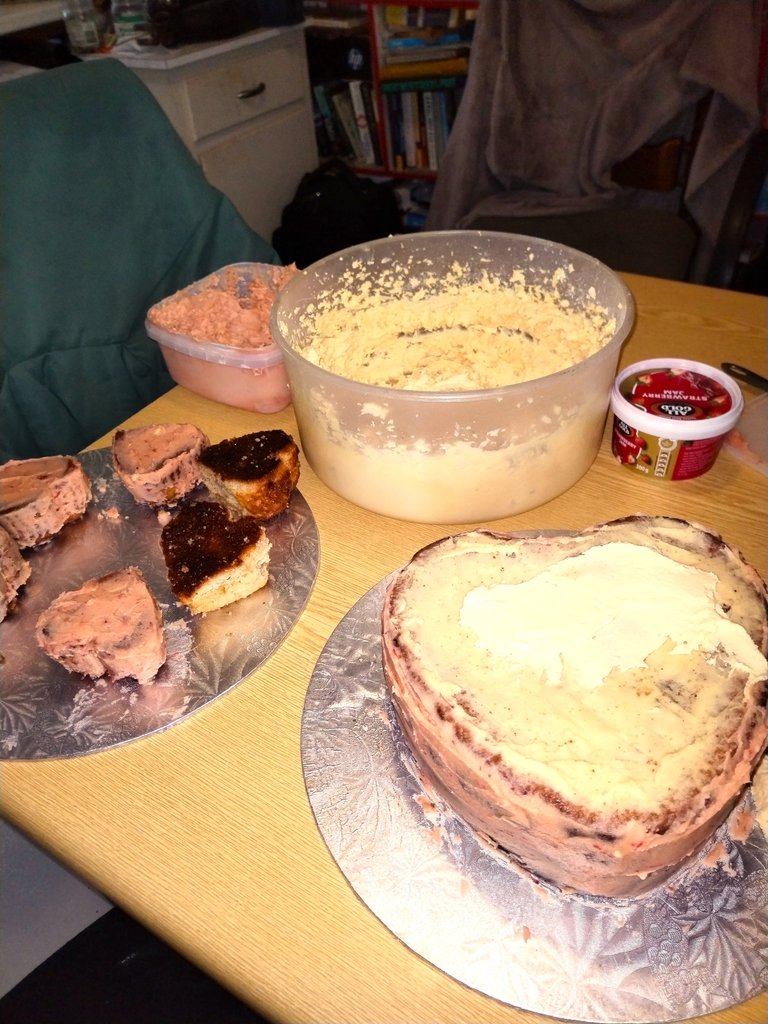
I had a bit of a tricky time with the baking and I will do things differently next time. I definitely over filled the cupcake heart molds and the cake tin which resulted in an initial beautiful rise, before the cake/cupcakes collapsed on themselves. It also took forever to actually get them to bake all the way through. This went for the cupcakes too! I then had to play switcheroo, moving the cakes around the oven to ensure the bottom and top didn't burn while the centre still had a chance to bake through. Next time I'll definitely use about half the batter, which just means I will be able to make more layers and cupcakes! I guess I was just impatient, and that is one thing you cannot bring to the table if you want your cakes to turn out perfectly! It it takes time, effort and a lot of love and shortcuts really do show up in the end and they're not worth it.
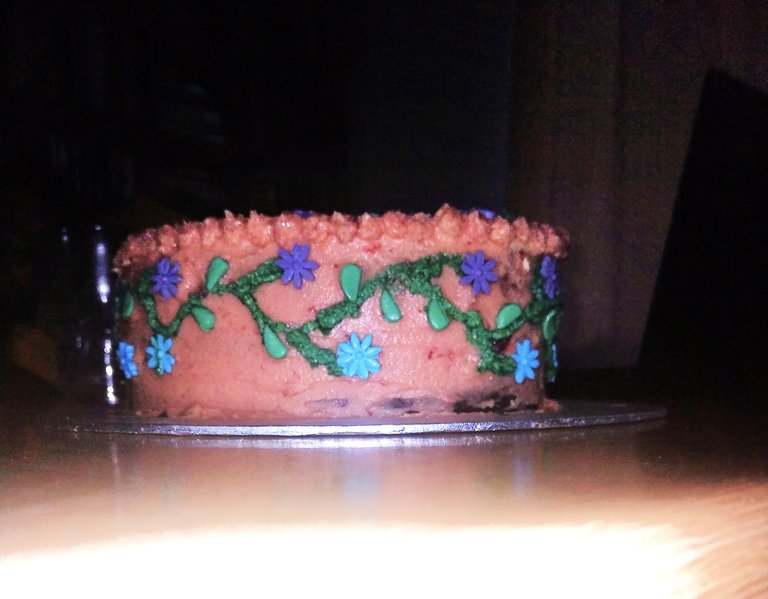
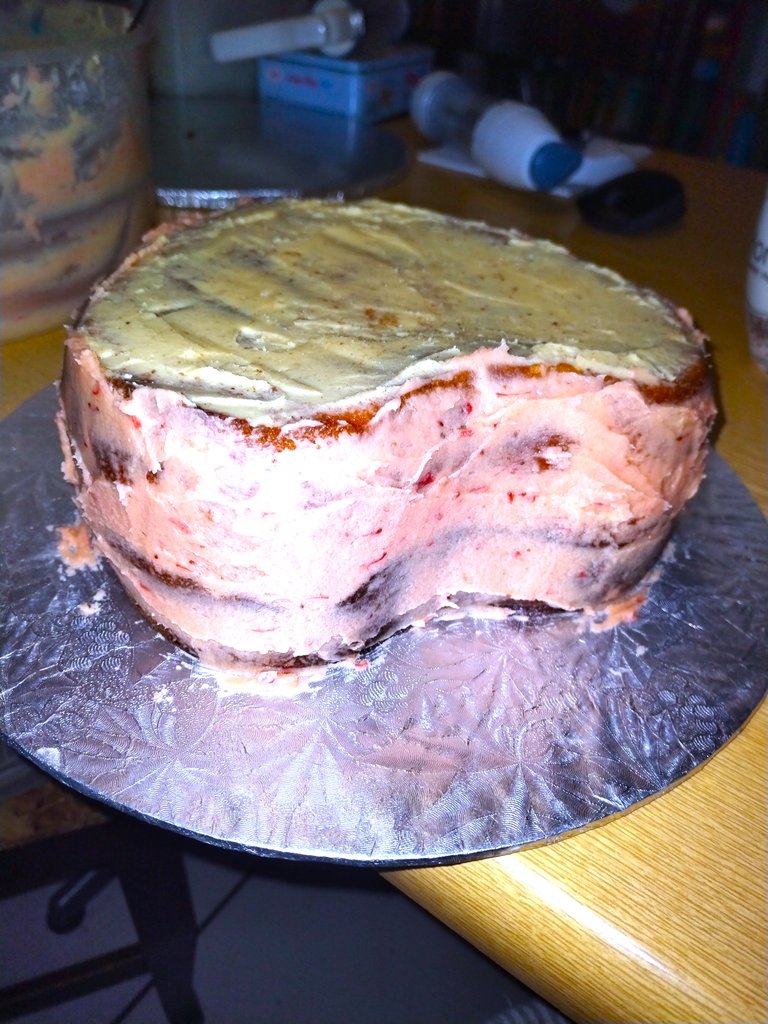
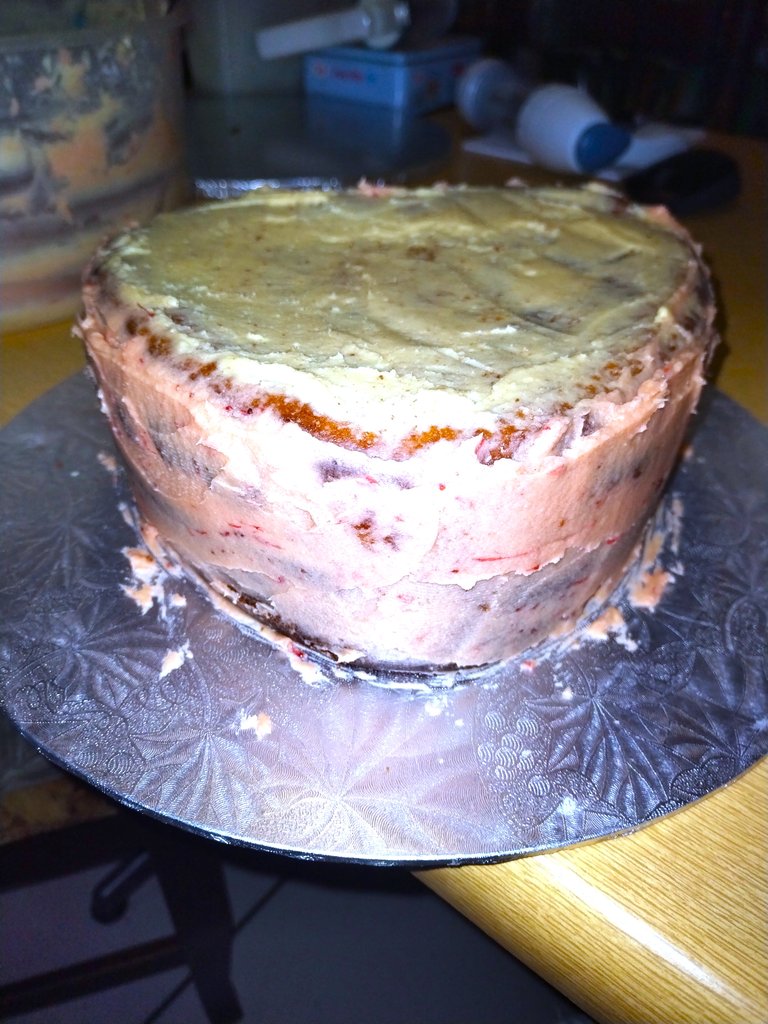
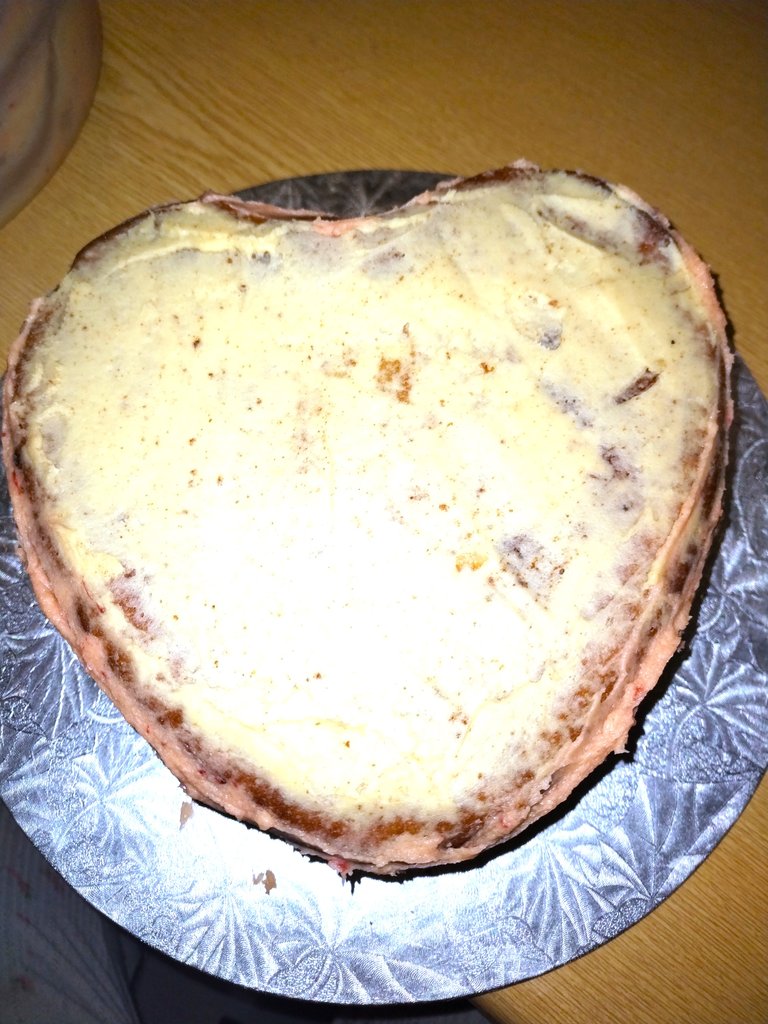
Anyway, it actually all worked out beautifully, thank goodness. I let the sponge cakes cool down and rest or 48 hours before icing.
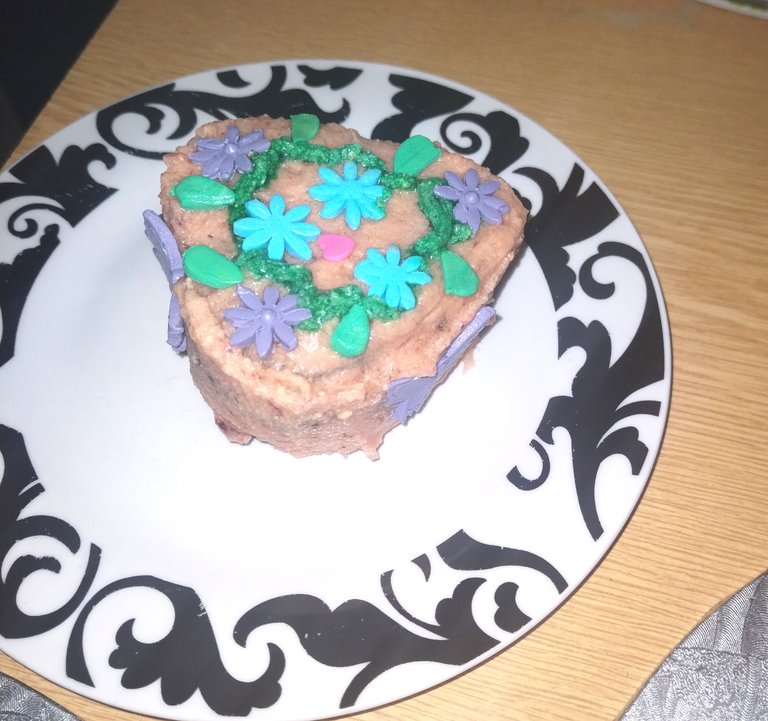
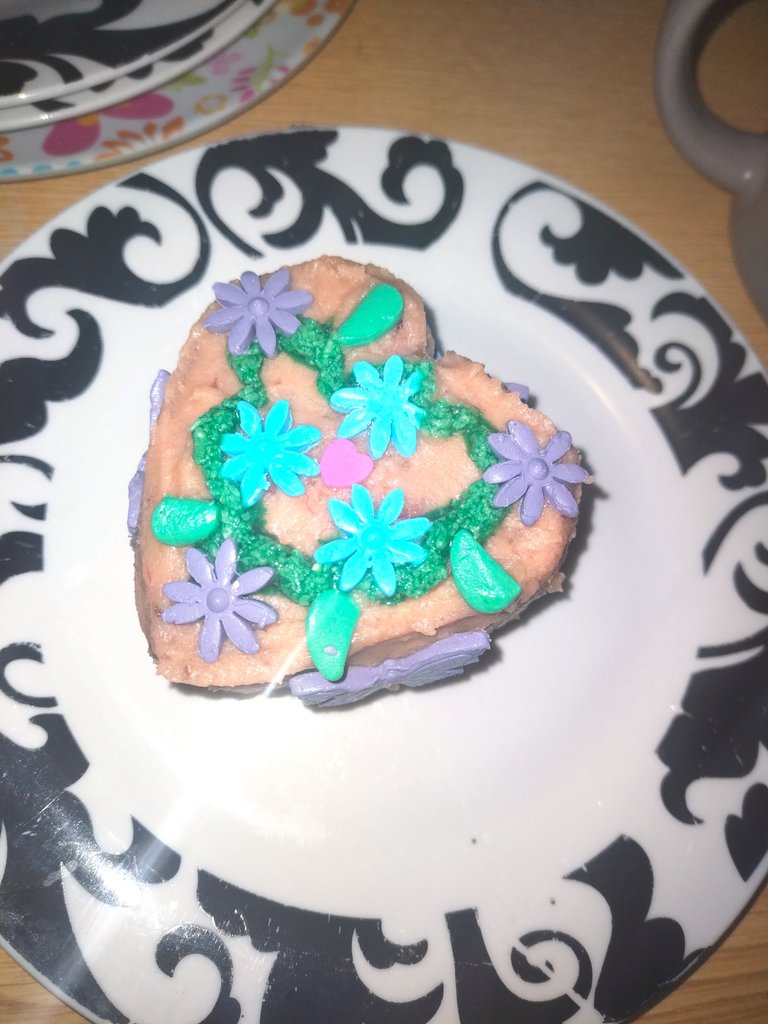
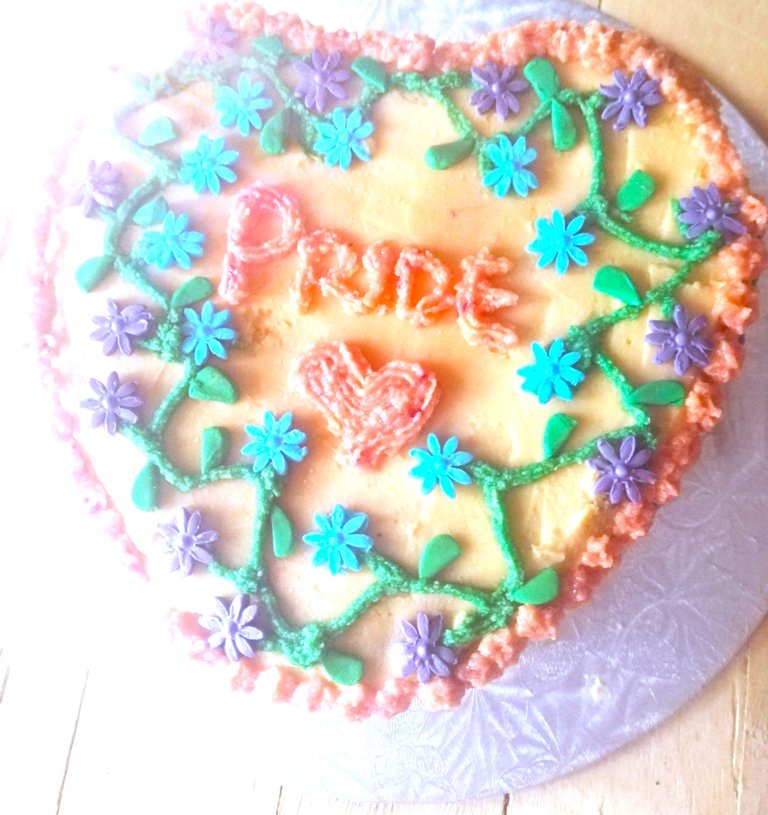
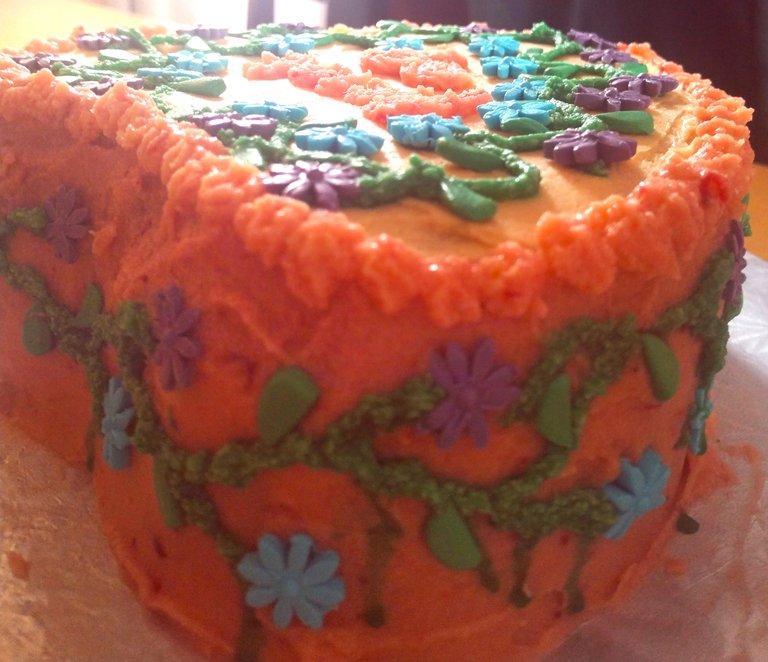
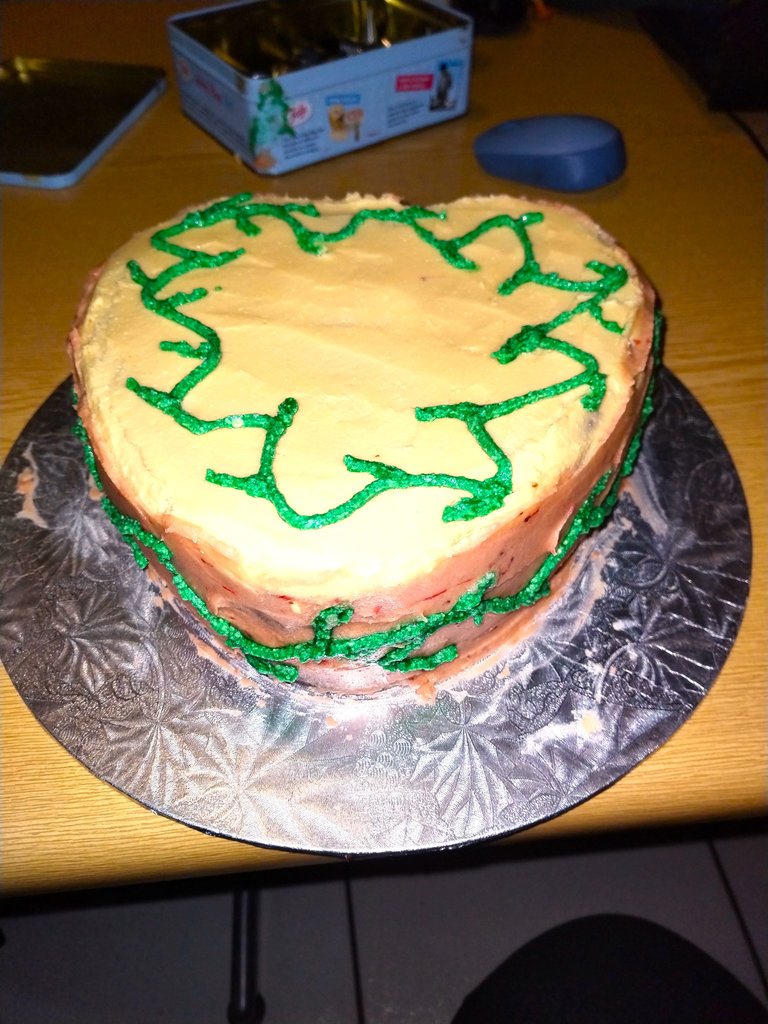
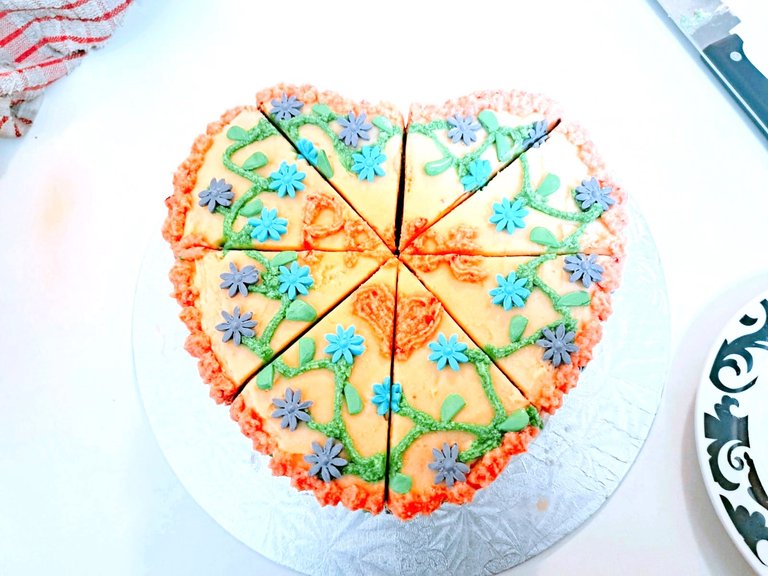
As for the icing, I'd been lying awake at night envisioning how I was going to decorate this celebratory cake. So I knew I definitely wanted flowers. I am so excited that I found my piping bag (I thought I'd lost it) as the piping gun is fine for the little rosettes on the outside, but is useless for writing and intricate decorating. I also discovered that I can use almost all my cake nozzles! I have so many! I would love to go on a course for cake decorating to learn how to properly use all the different shapes, but considering I'm still a "novice," I think it turned out pretty beautifully!
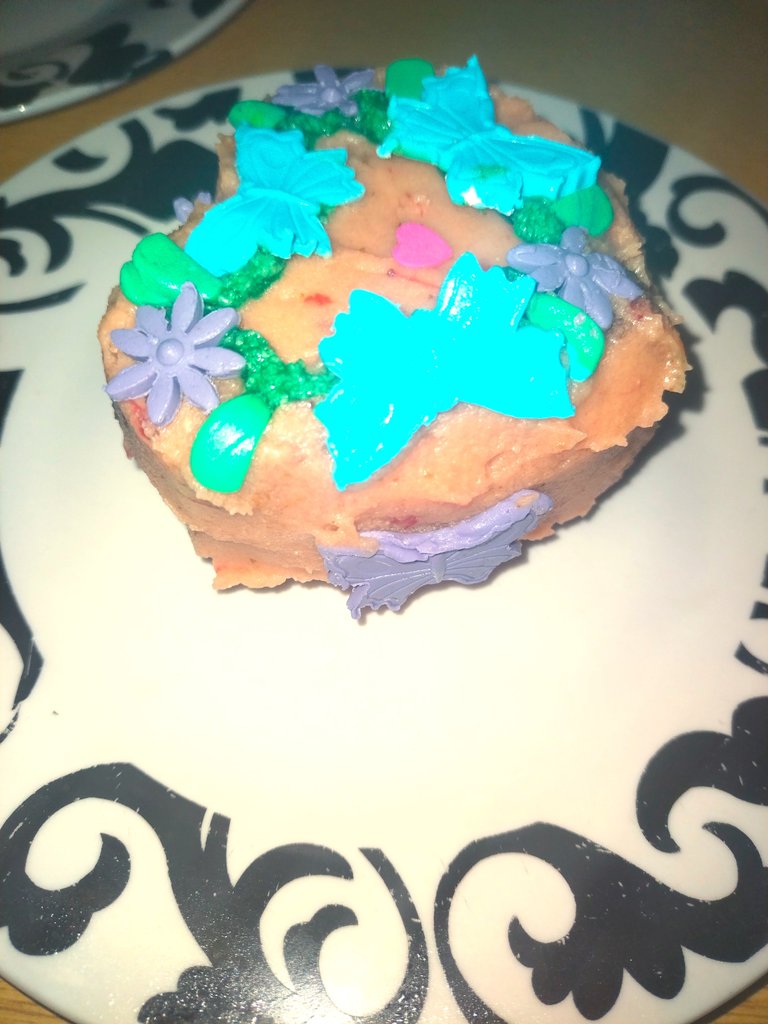
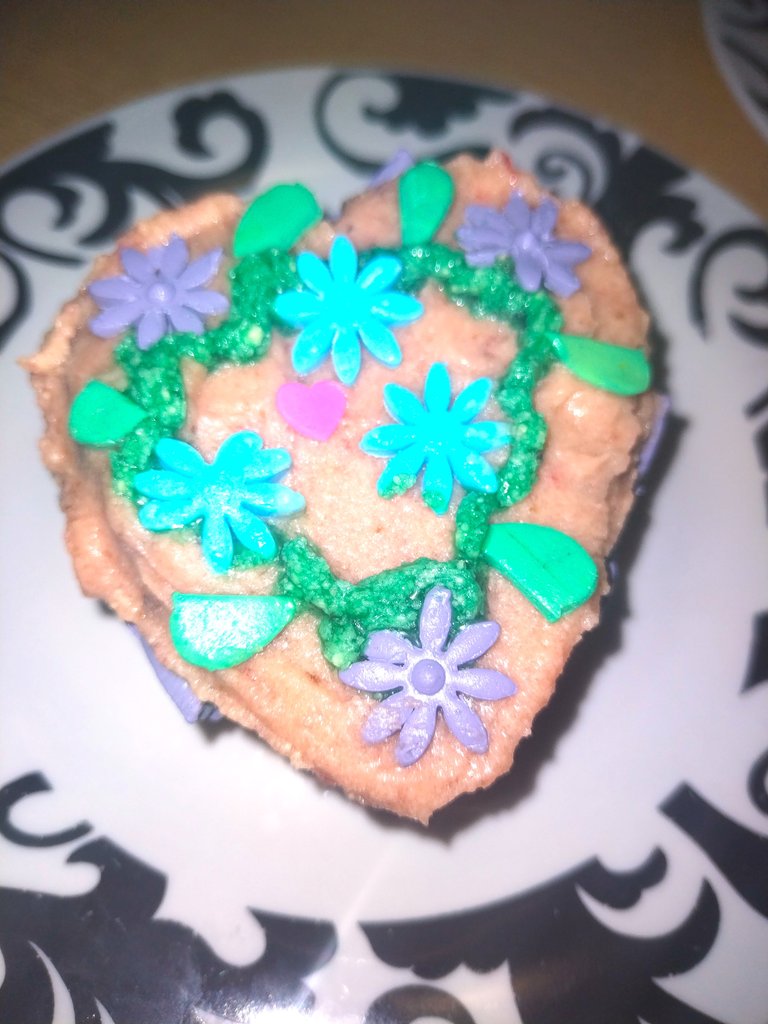
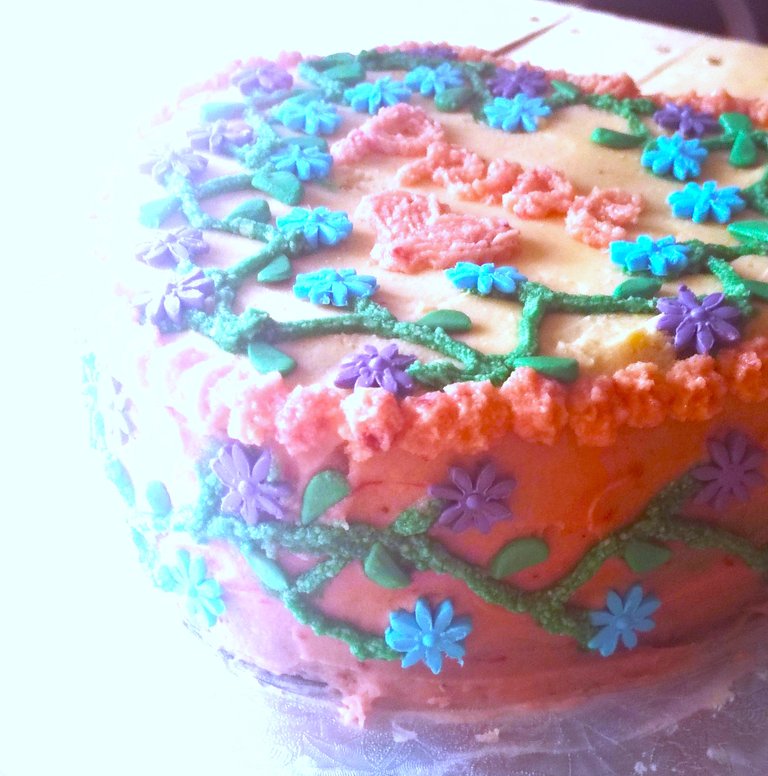
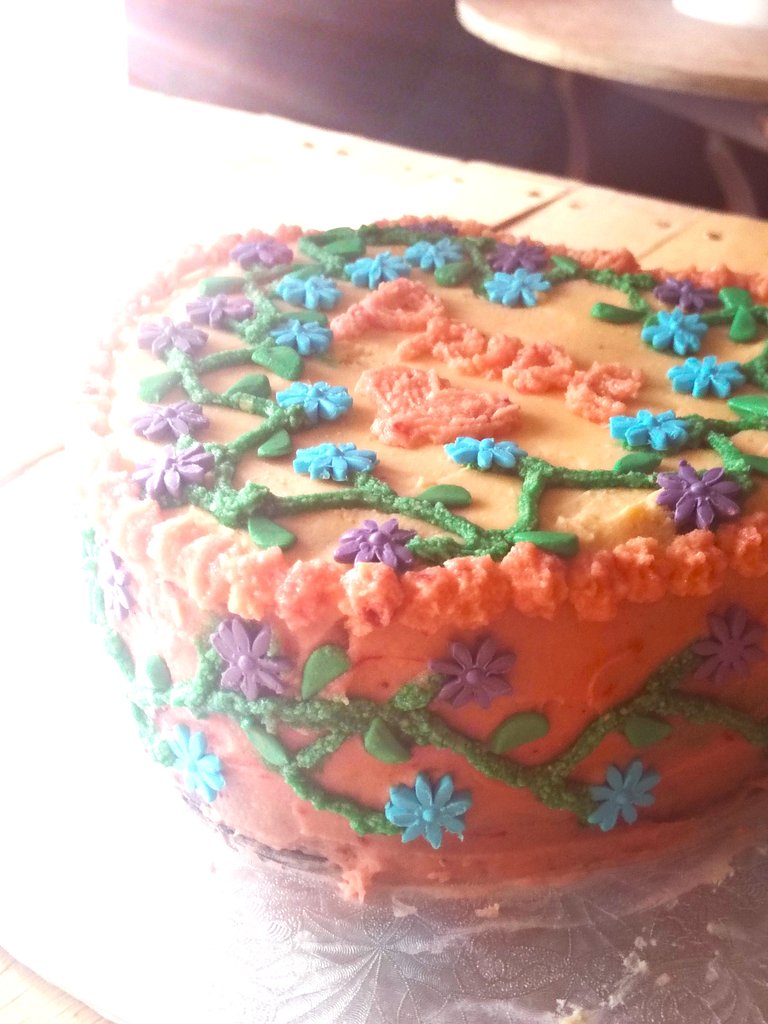
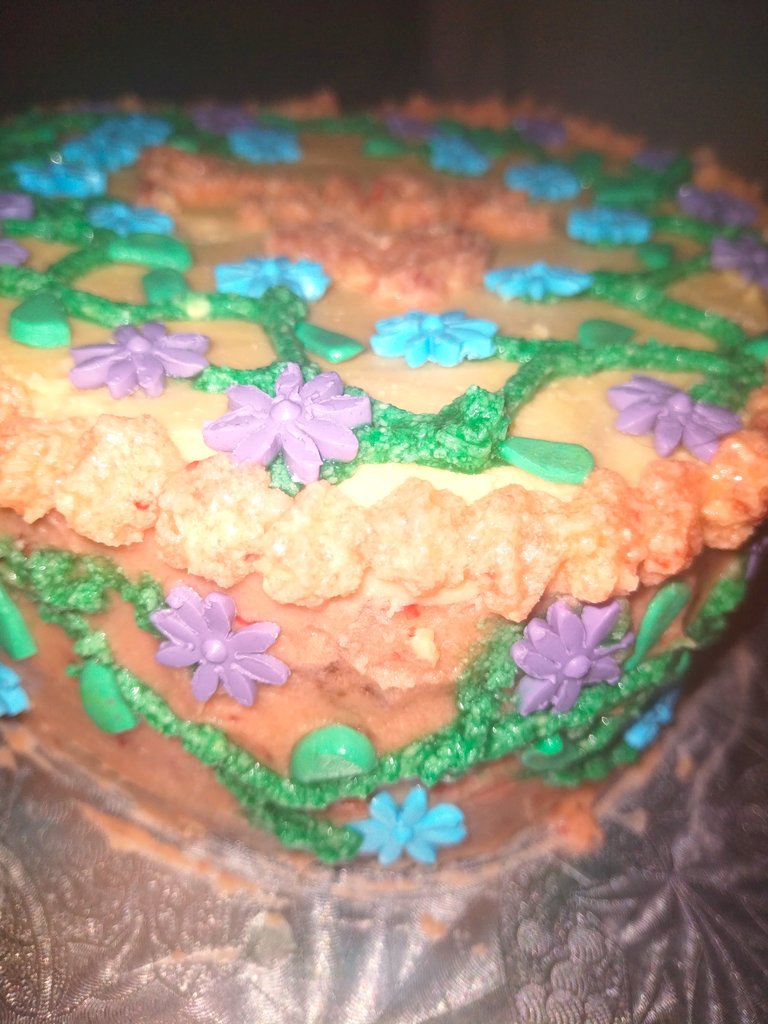
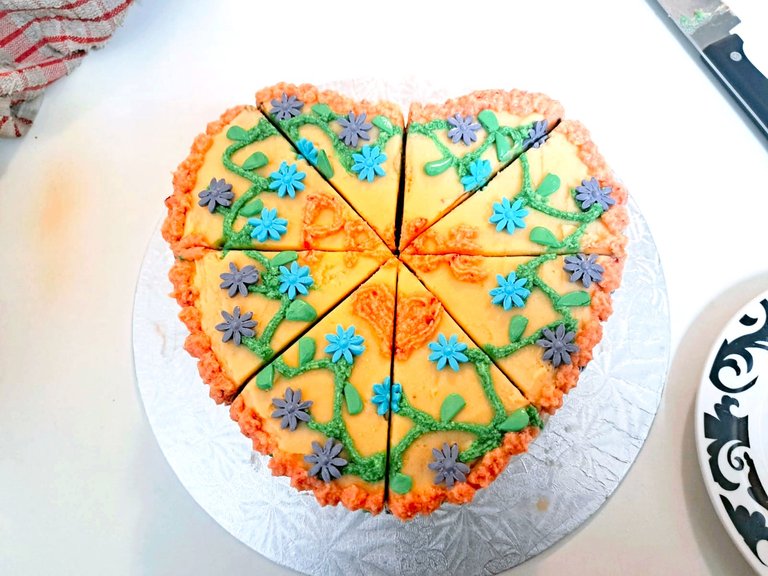
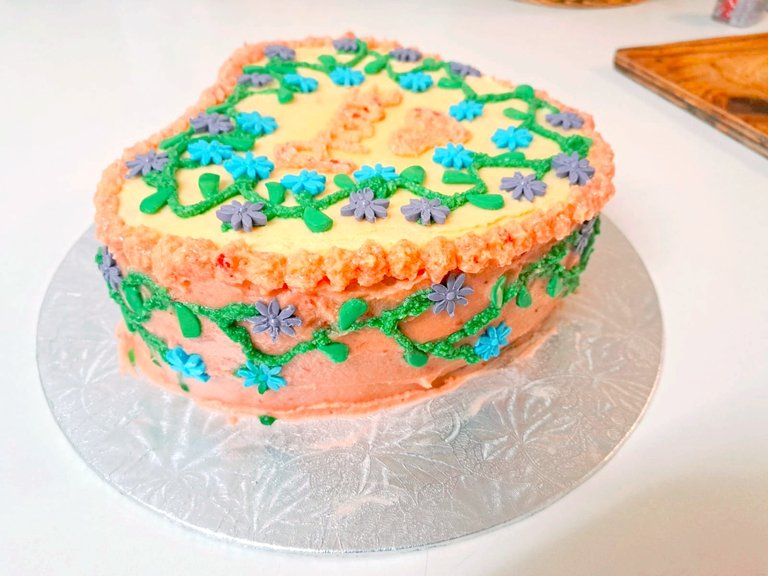
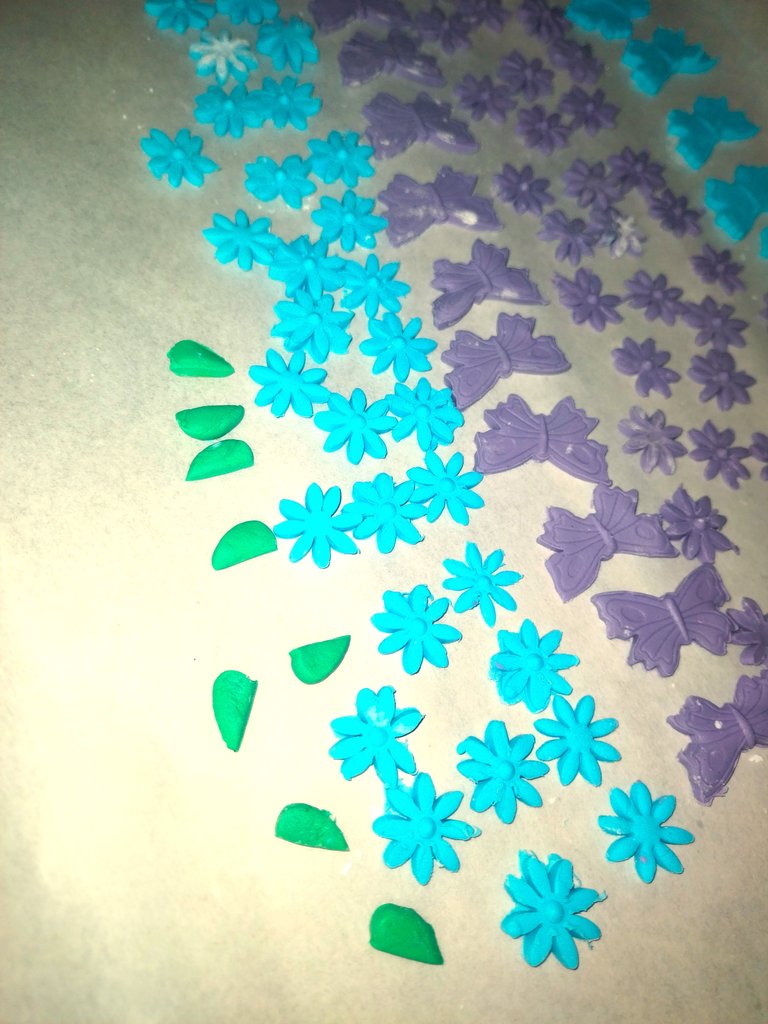
I ended up using the remainder of my fondant to make the beautiful flowers, butterflies and even the leaves! The remaining fondant I had was already blue, so I had limited options as far as colours go, but it actually turned out wonderfully and looked very delicate! The idea was to try to incorporate all the different flag colours, but I couldn't really use red, orange or yellow as it would have ruined the cake.
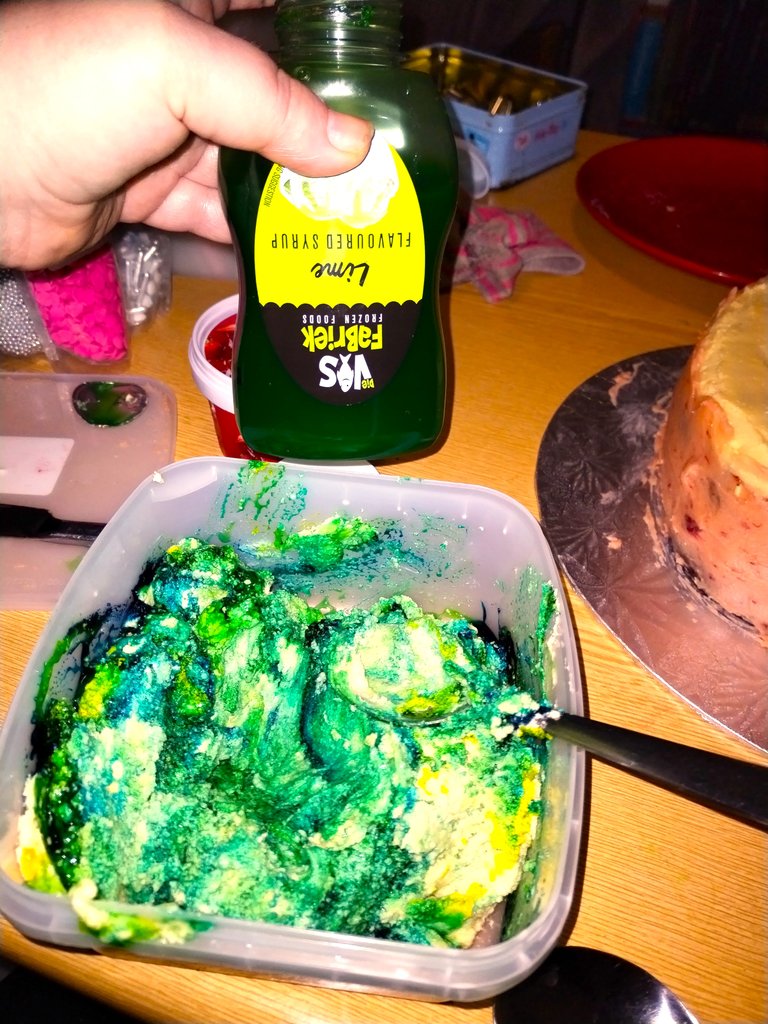
The icing was an interesting adventure too! I wanted to try something different. I personally love strawberries, so I wanted to incorporate that into the icing. I also have some lime syrup, which turned out to be too "thin" to use in a piping bag, so I had to mix it with a bit of vanilla icing and then added gel colours to achieve a lovely natural green for my vine branches.
Back to the fondant, using the stamps is actually a little harder than you'd think. your fondant can't be too thin, otherwise the decoration will just fall apart. You also need to make sure there is enough icing sugar underneath the rolled out fondant so that nothing sticks. Ideally, the best thing is if the decoration comes out inside the stamp. This allows you to brush off excess fondant and ensure neatness. it also gives you more control and is less likely to cause damage to the very delicate decorations I had chosen.
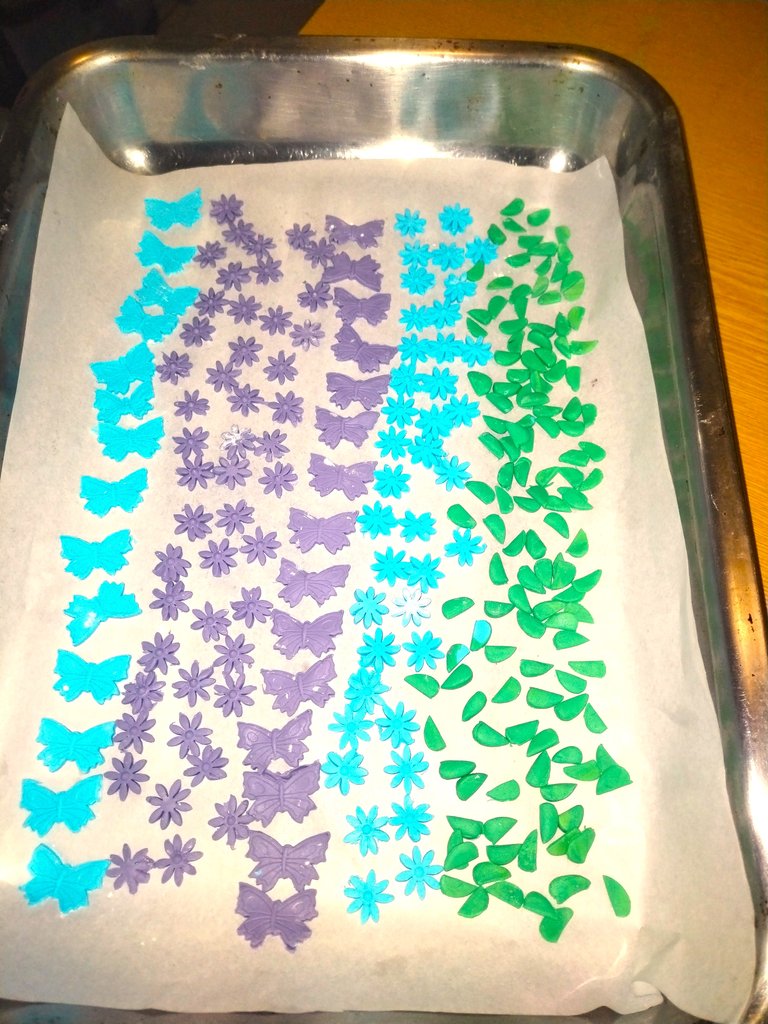
I wasn't initially sure how I was going to make the leaves. Once again, I thought about piping, but then had a great idea! I used the heart stamp and then just cut them in half to make lovely little leaves!
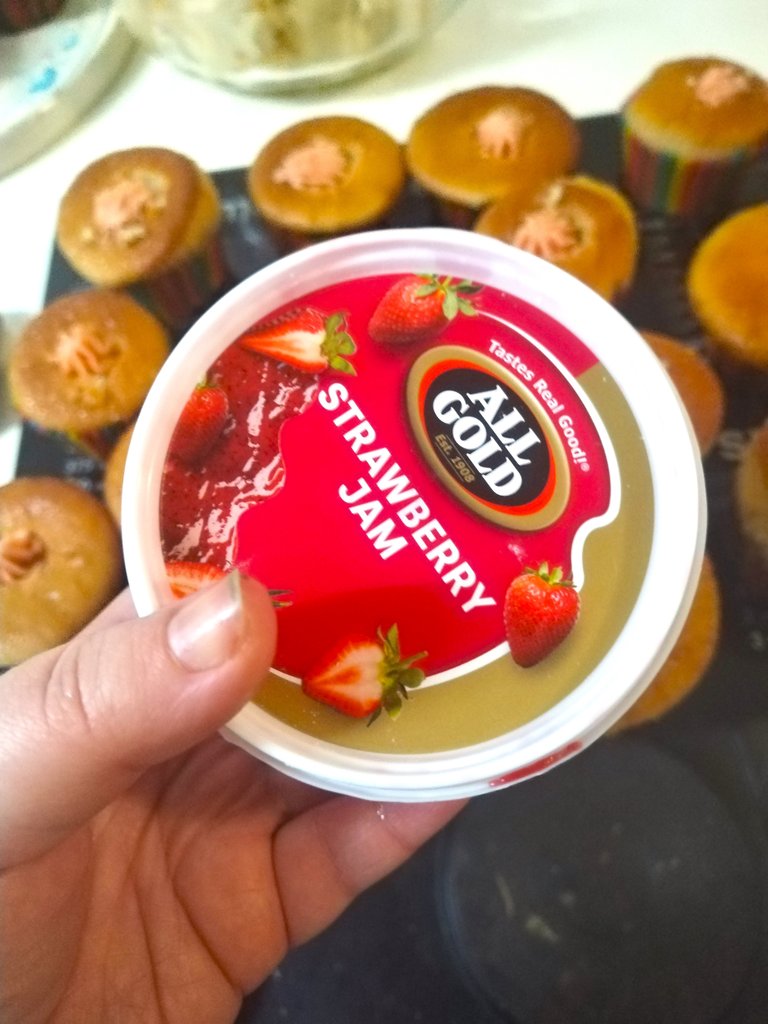
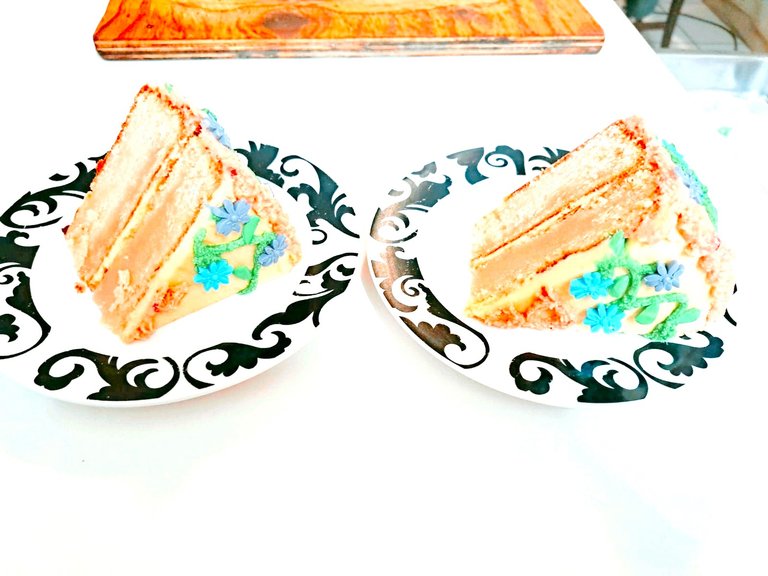
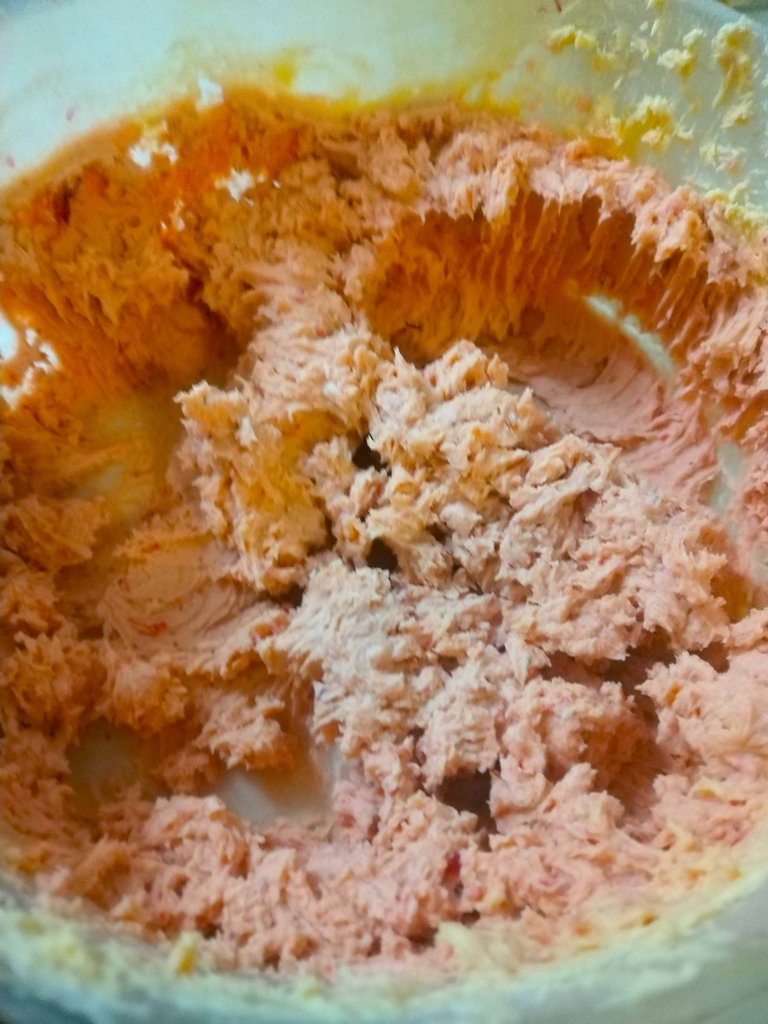
The strawberry icing turned out beautifully, but definitely needed to be used in moderation. I covered the cupcakes entirely in strawberry icing, which turned out to be far too sweet. On the cake though, I used mostly vanilla icing with the strawberry icing reserved for decorations. That balanced things out really well.
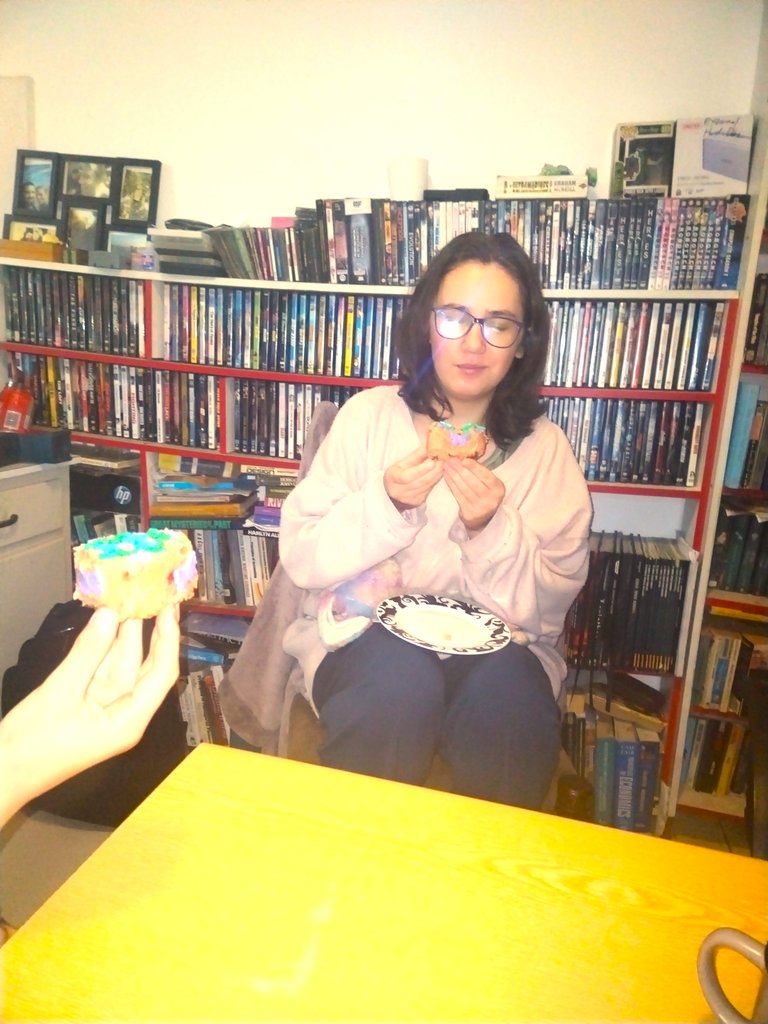
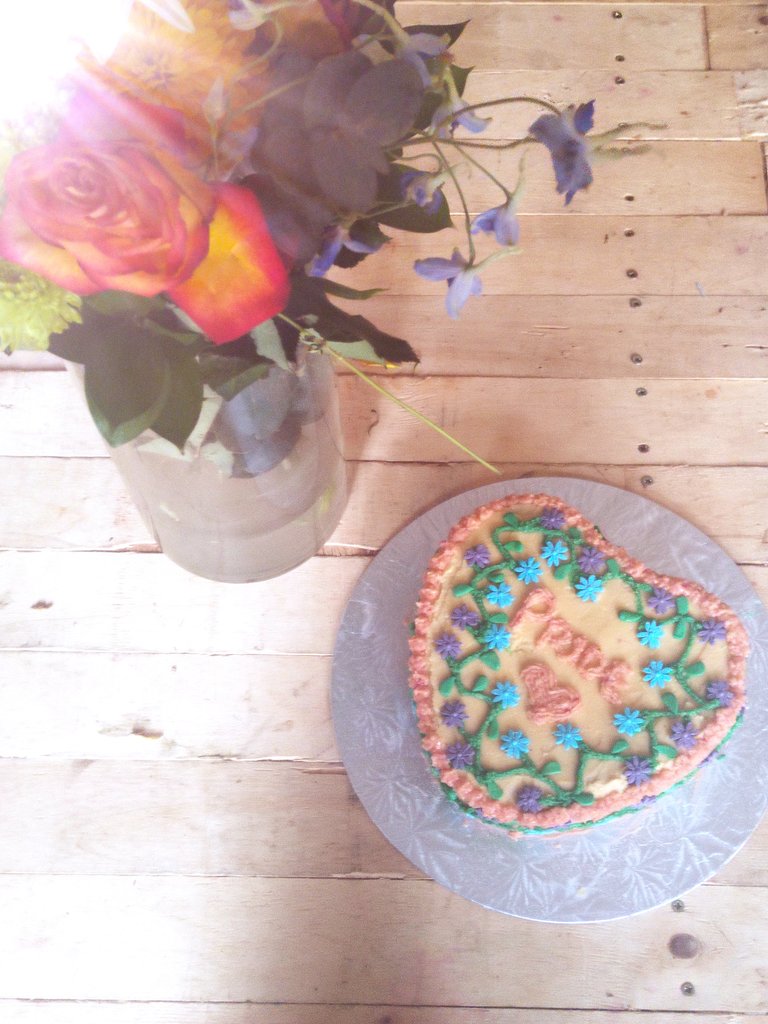
I am so enjoying being able to express myself creatively and bringing my visions to life in my cakes! I really think this one turned out to be really beautiful.
Happy Pride Month to Everyone!
Tools:
- Heart shaped cupcake holders - I have silicone ones that work really well
- A spring form heart shaped tin
- A wooden spoon
- several tablespoons
- Several teaspoons
- Several butter knives
- A fork
*An electric beater - A measuring cup
- Preferably two plastic bowls, one for dry ingredients and one for wet ingredients (I couldn't find my other bowl. It's gone missing in my Tupperware cupboard - and we all know what that means. I suppose I'll get it back when it's bored of the alternate universe). I had to use one, which was not the end of the world.
*Baking paper - Scissors
- Spray and Cook
- A few extra bowls for creating different colour icing (I only made vanilla, strawberry and green/lime icing)
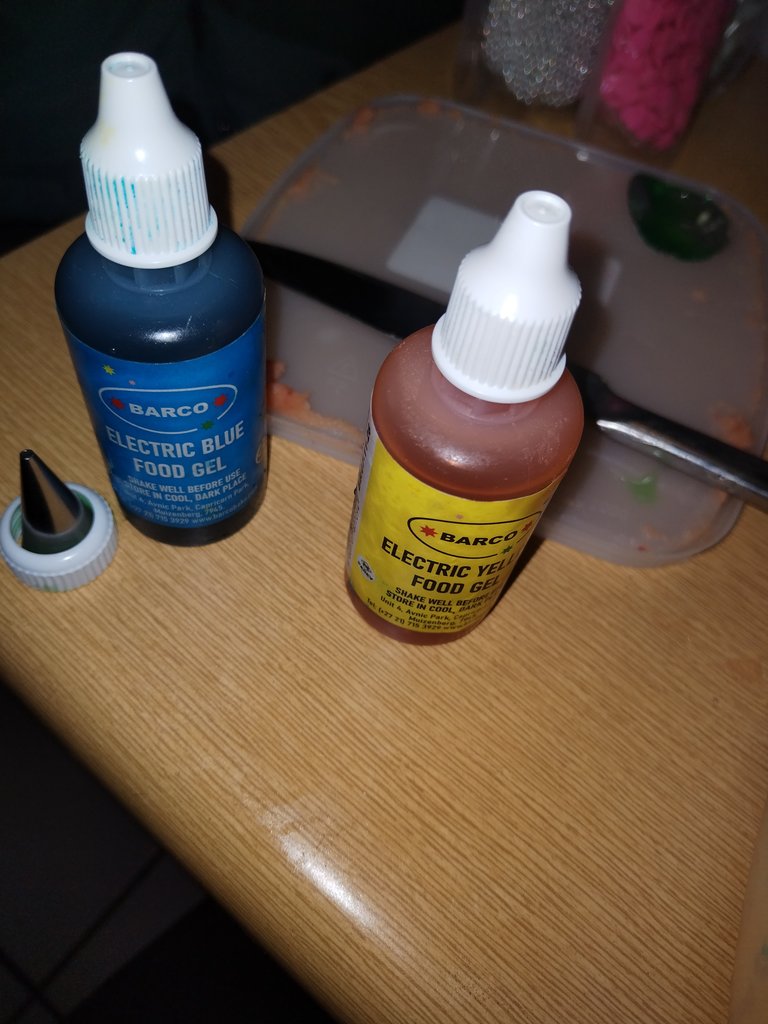
- Disposable gloves, when working with gel colours for icing or fondant, to ensure your hands don't end up stained for weeks. The gel colours are hectically intense.
- A Piping bag and nozzles
- Stamps for fondant decorations
- A rolling pin (@aimeludick has a lovely small one which is perfect for rolling out small amounts of fondant)
Vanilla Cake/Cupcake Ingredients:
- Eggs x 2
- Flour 2.5 cups
- Castor sugar x 2 cups
- Baking powder x 3 generous teaspoons
- 120ml sunflower oil
- 1 teaspoon salt
- Vanilla essence
- 240ml milk
- 240ml water
Method:
Mix all the wet ingredients and the sugar together and beat until fluffy and very well combined.
Add the dry ingredients and add milk and water slowly while beating.
The batter will be very thin. Don't be concerned, it's meant to be this way.
Pour into molds and the cake tin. I overfilled both, so I would like to experiment with less batter next time, and see how much is left over and what I can do with it.
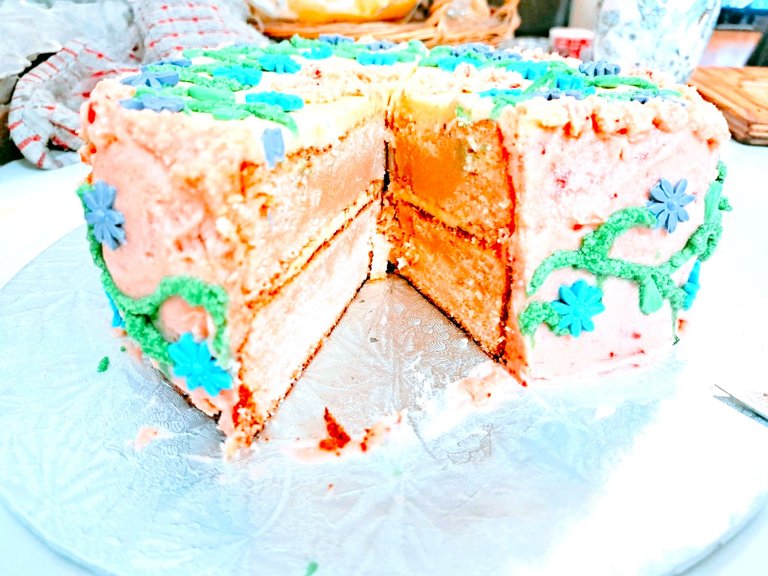
The result was a slightly heavier cake than I had originally planned, but this actually worked in my favor when it came to icing as it's form was more stable and less likely to fall apart, for instance I actually needed a cake that could handle multiple layers of icing. The final cake was beautifully tasty and very moist. I was really happy with the final result. Sometimes mistakes turn out for the best!
Icing Ingredients
- 300 grams good quality strawberry jam
- Lime Syrup
- Blue and yellow food color gel
- 1 kg icing sugar
- 1 kg butter (soft)
- Vanilla essence
Method:
You initially want to make the vanilla icing and then spoon out the approximate icing you'll need for the other flavours into separate bowls.**** Remember, when it comes to flavoring and colour, you can always add but you cannot remove!**** Especially if you've run out of vanilla to try to dull it out. And sometimes, even adding more vanilla icing doesn't help enough.
Vanilla Icing
Add butter by slicing into small pieces with a knife for easier blending. Add vanilla essence & icing sugar, ad blend with the electric hand mixer. If you find your icing is too thick, you can add cream (this actually works really well) or milk
in tiny amounts. Once again, the rule applies that you can always add more but you cannot remove! So go slowly if you want to add extra liquid.
Strawberry icing
I simply added 300 g (the whole tub) of strawberry icing to the vanilla icing: approximately with a ratio of 1 part strawberry jam to 3 parts vanilla icing. You can buy smooth strawberry jam, but I really wanted to see those strawberry pieces in the icing. It looked lovely, but it did clog up the piping nozzle. This was an easy fix though. All you need to do is unscrew the cap and rinse the nozzle to remove the blockage.
Lime Icing
I had never used this syrup before. Remember it's always a good idea to test out icing or syrups like this on a spare plate or spare baking paper to make sure the texture is correct. I could see immediately as I poured that the lime syrup was far more runny than I thought it would be. So, I added vanilla icing and some extra colourant. I'm to glad I did this because the colour I achieved was far more natural and matched my little leaves perfectly!
I used vanilla icing in between the layers of the cake and to coat the outside, reserving the coloured icing for decorative purposes. Both the lime and the strawberry icing were very tart and sweet, so moderation was key to ensure they complimented the vanilla without overwhelming it.
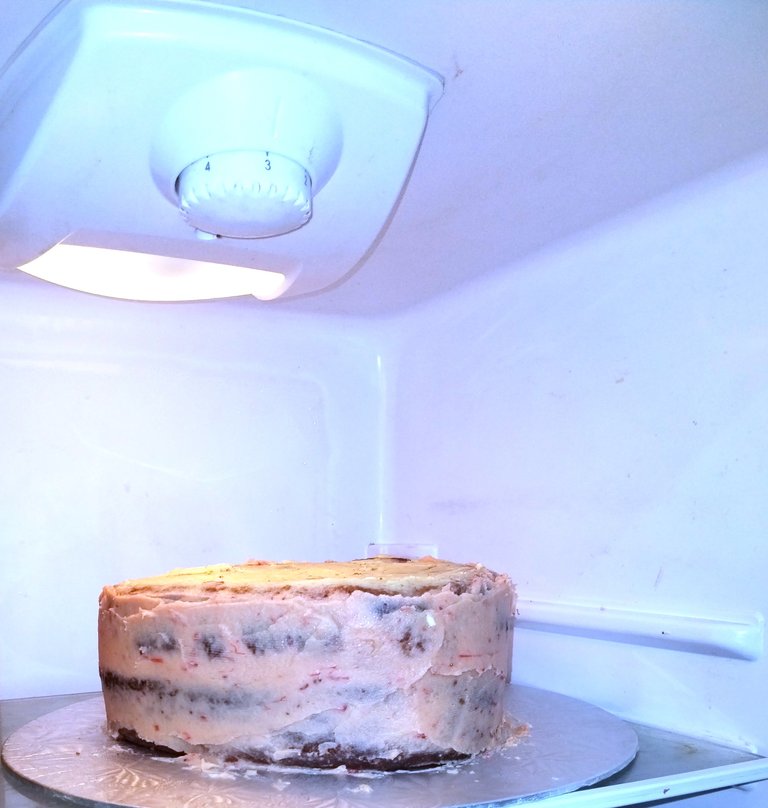
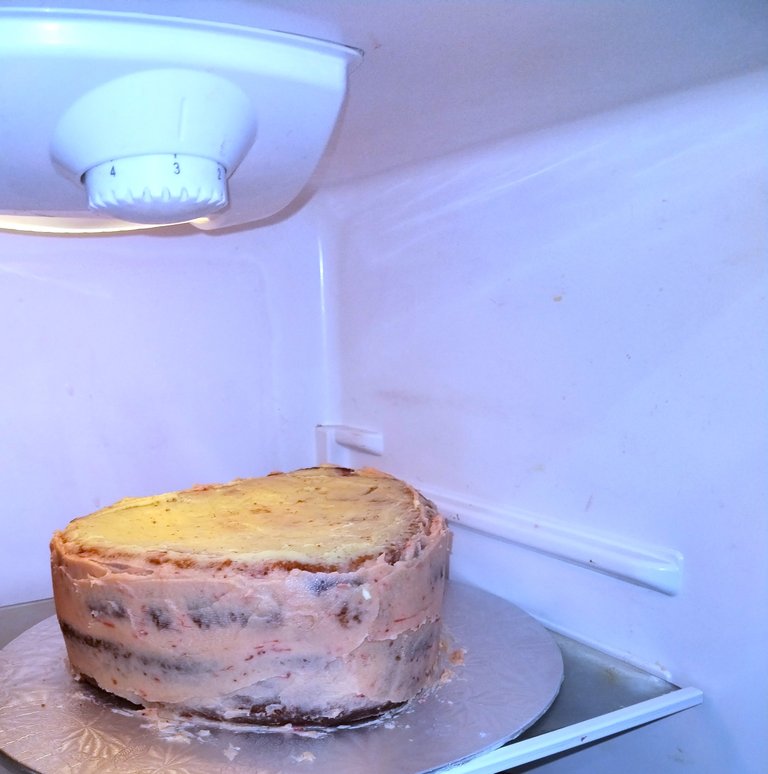
Once you have done a basic crumb coat of the cakes and cupcakes, put them into the fridge to set before adding final layers. This helps the final layer to be smooth and free of cake crumbs that inevitably come off in the icing process.
Fondant
This is definitely something I need to keep stock of. It's notoriously difficult to make my hand, so buying it in kilo batches from the baking shop is really a good idea! I had no idea how versatile it is!
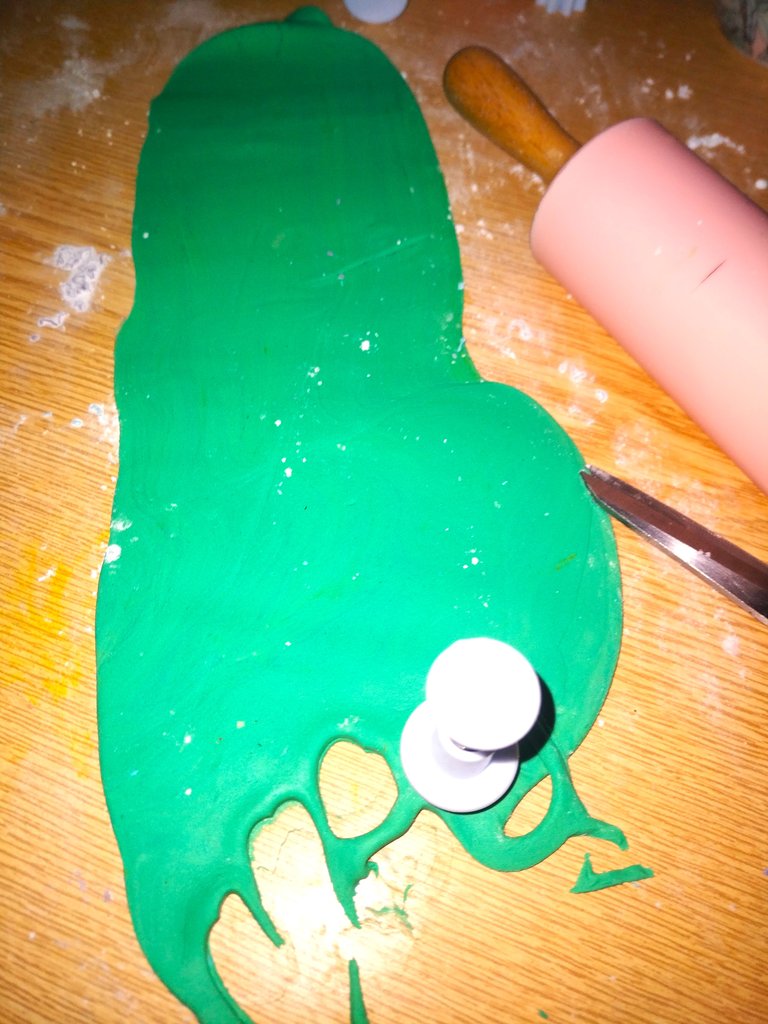
prepare your working surface is clean and dry, Then sprinkle the surface and your rolling pin with icing sugar to ensure it does not stick when rolling out or when punching out shapes from the stamps.
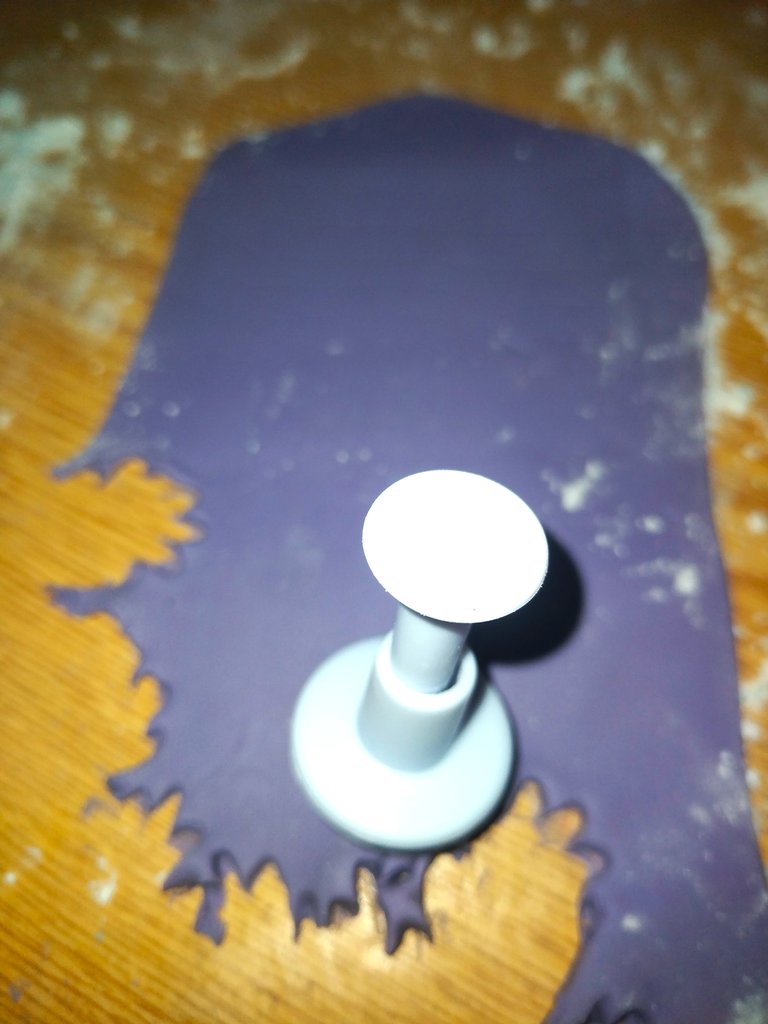
When using the stamps, try to stay close to the edges. It's just easier to separate and lift. You can place your decorations onto a tin lined with baking paper until you are ready for them.
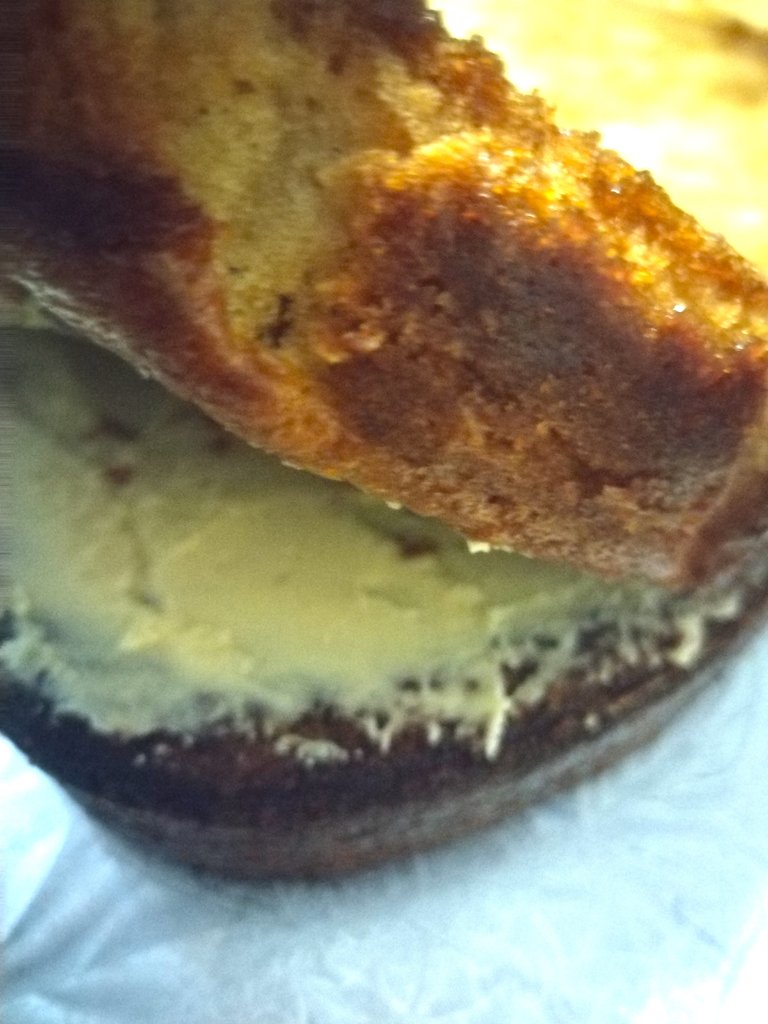
if your fondant is to thick, you don't press hard enough or aren't close enough to the edge, you risk ending up with a tragedy like this.
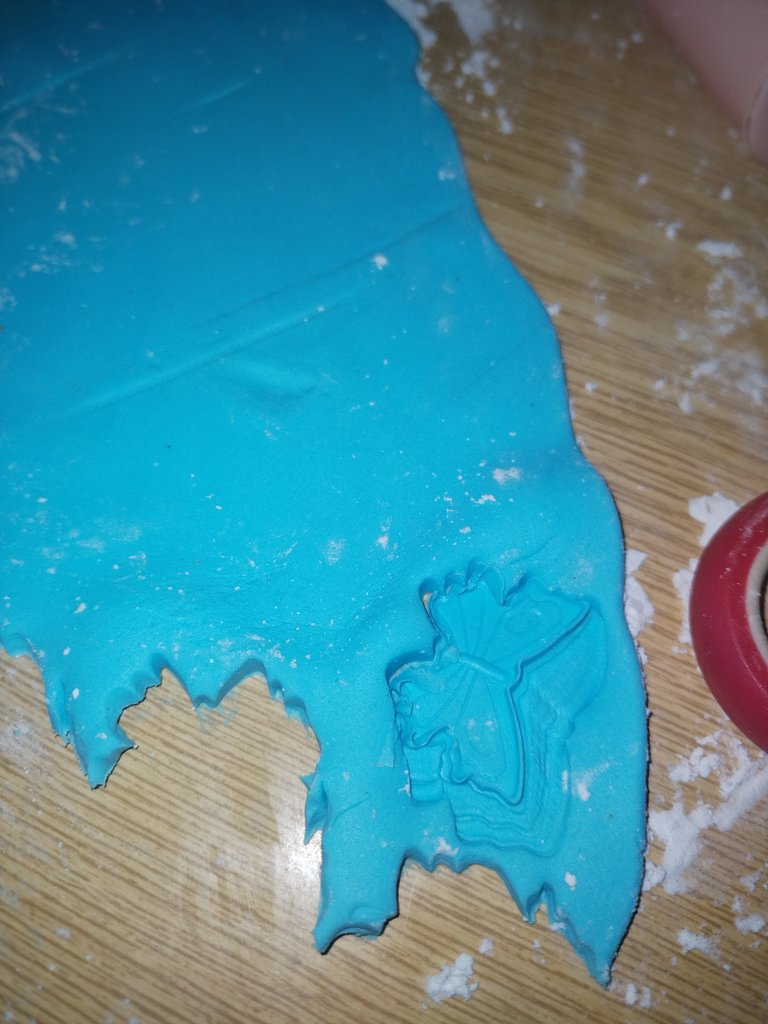
Roll the fondant to about 3mm and stamp out your shapes, gently placing them onto your prepared surface.
Also remember to press hard to ensure separation and that the patterns in the stamp transfer effectively to the decoration.
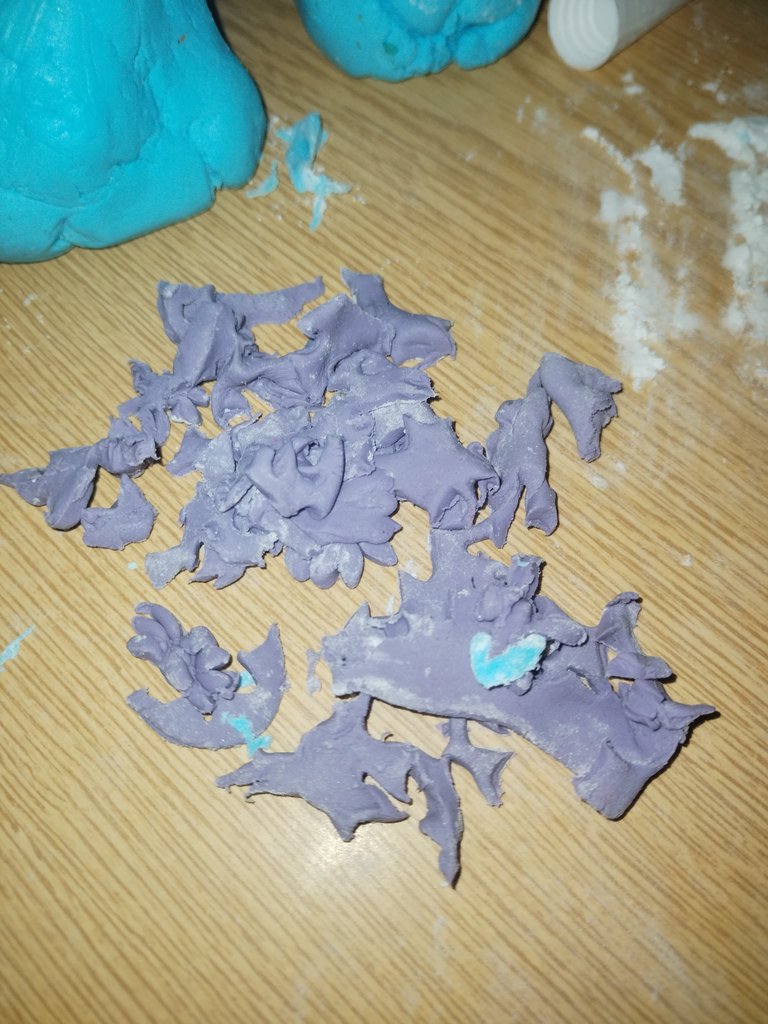
Left over fondant can be reused! collect on the side and you can roll and knead back into a ball that can, once again, be rolled out and cut into shapes. Waste not want not!
I recommend adding as much of the icing as you can first before adding the decorations, including the green vines. Don't add the rosettes on the edges yet though. they'll just get messed up. you can do that last.
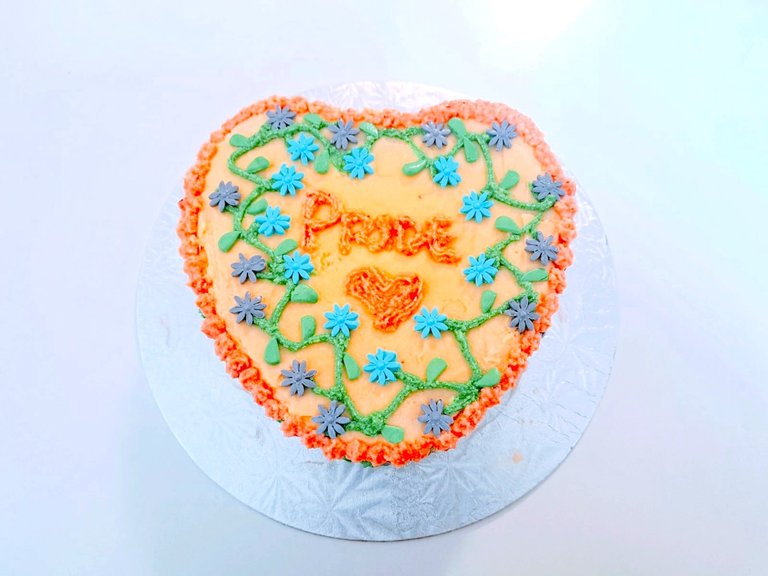
****Remember to plan out your writing. I ran out of space, but at least I got to write the most important part! Writing with a piping bag takes practice. Don't try fancy fonts or too much writing to start. You'll develop as you gain experience.****

I really enjoyed making (and of course eating) this cake! It had lovely summer flavours and reminded me of spring! It is the middle of winter here, so it was nice to just close m eyes and imagine the taste and smell of spring. The decorations also really helped!
Remember, your cake has to be delicious as well as pretty!!
The whole point was to create a beautiful cake that celebrated Pride Month for my daughter @aimeludick! I hope I did pride month …well …proud :)
Once again Happy Pride Month to all my friends who are celebrating! 🏳️🌈🌸🌷🌈🏳️🌈💖