ENGLISH.
Greetings, dear foodie friends 🤗
A couple of weeks ago, I was looking at a recipe online that I absolutely loved. It was love at first sight because the ingredients used are some of my favorites, plus it doesn't use refined flour, and the presentation was fabulous. I'm talking about a Mocha Cake! 😋
I confess that from the very beginning I was anxious about making this recipe. I imagined how delicious it would be, but at the same time I thought it might not turn out well, and I was afraid something would go wrong and I'd lose the ingredients, which are very expensive.
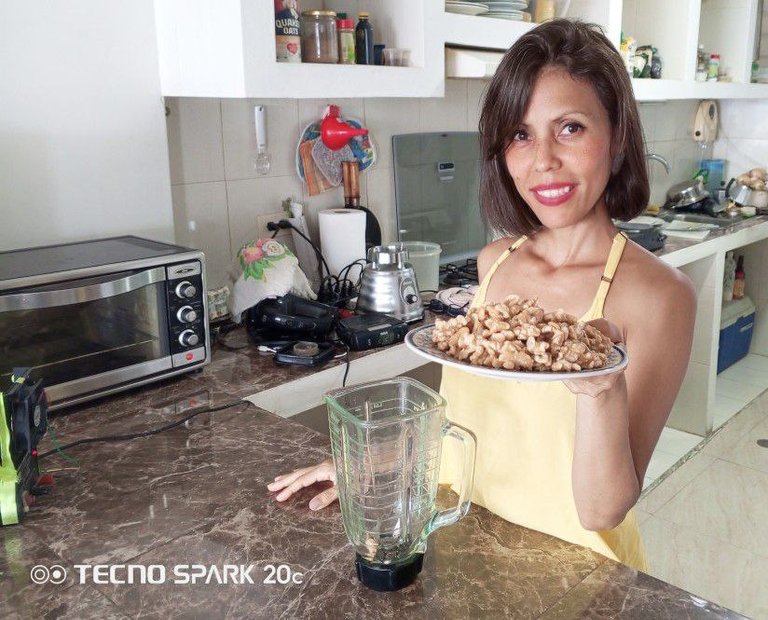
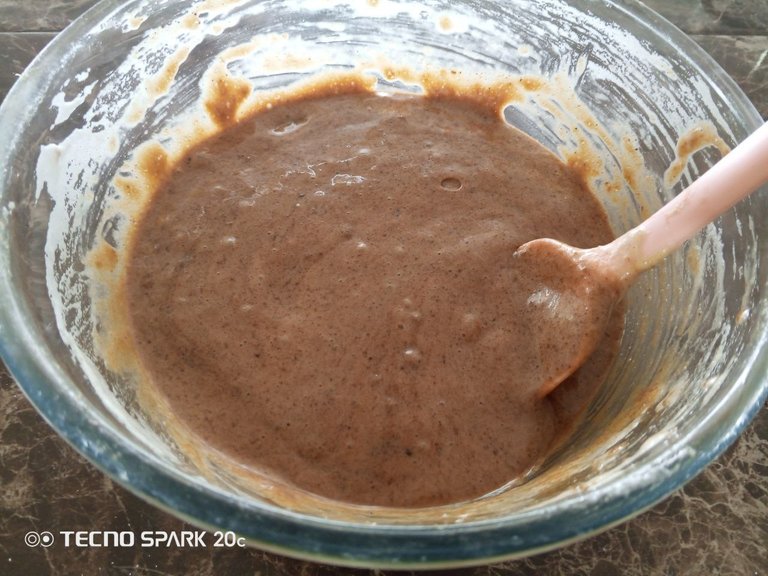
It was a feeling I was worried about because I needed a food processor to get the cake texture right, and I don't have that device, so I thought it might be the same with a blender. I wasn't sure, but I wanted to try. Mixing some ingredients together is supposed to give the texture something like breadcrumbs, but I ended up with a chocolate and walnut paste. When I saw that texture, I got a little discouraged because at that moment I knew the recipe wasn't going to turn out like the one I'd seen online.
I didn't want to stop; I had to keep going. I couldn't lose the ingredients, so I kept going. And even though I did all the other steps the same as the original recipe, I definitely didn't get a cake; it wasn't the same recipe anymore.
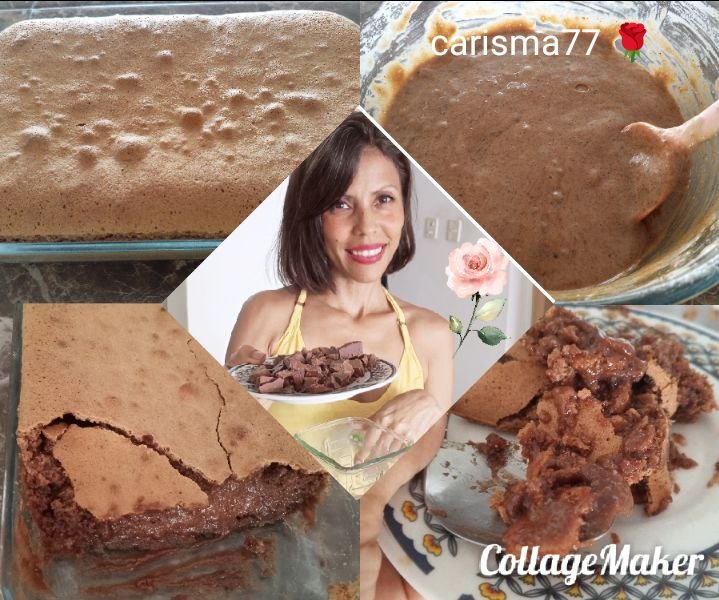
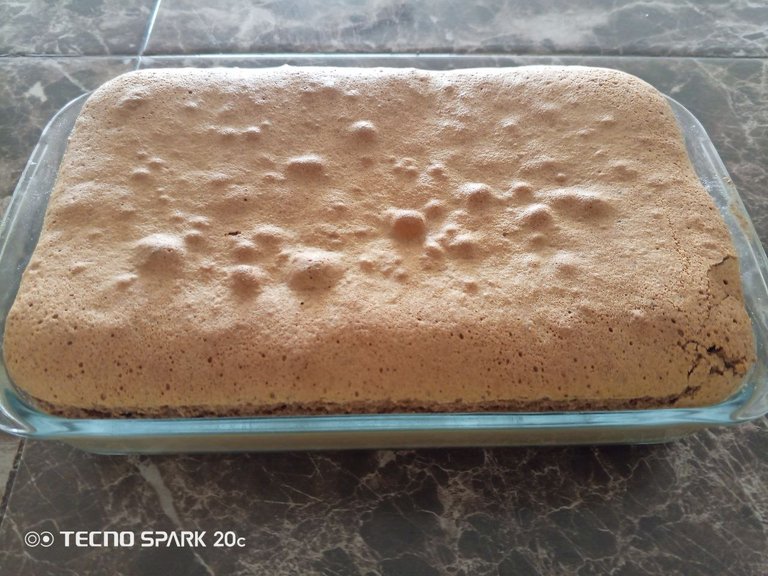
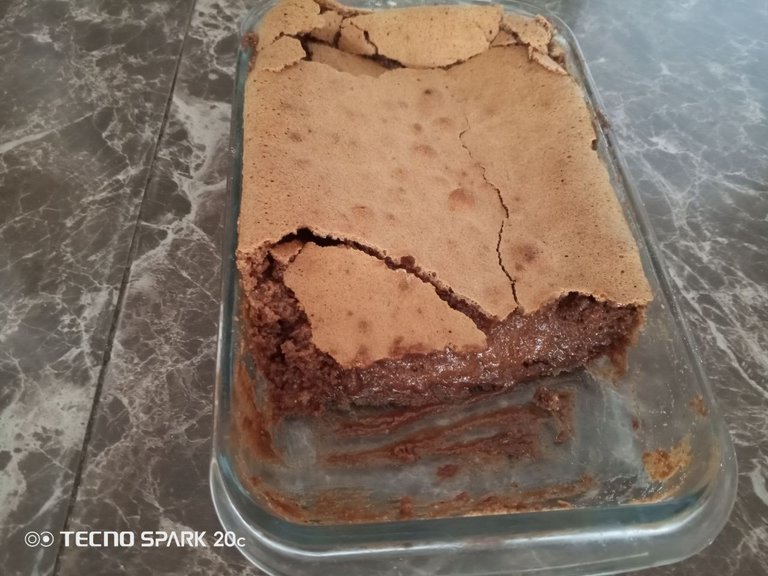
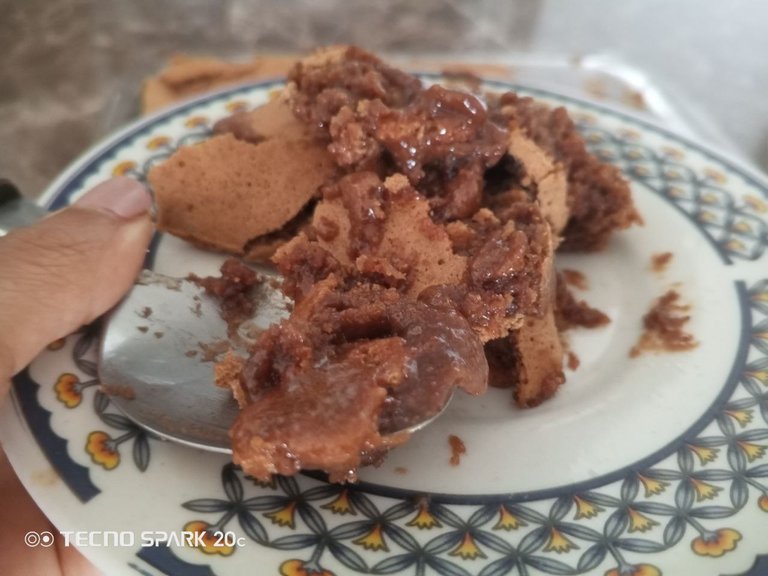
It was delicious, though. The surface texture was crunchy and very thin, like a delicious, very delicate and fragile cookie. The inside was creamy. Despite having cooked it long enough, it never firmed up. But when I tried it, I fell in love with the flavor. That combination of walnuts, chocolate, and coffee is insanely delicious! 😍
The dessert doesn't look pretty, but it tastes delicious, and instead of cutting it with a knife, I have to serve it with a spoon because it's so creamy! That's why I'm showing you the recipe today. Now you decide whether you're going to use a food processor or a blender. For my part, I'm seriously considering buying a food processor because, although the dessert was delicious, I wanted a moist but firm cake.
If you're interested in the recipe, I invite you to join me 😉
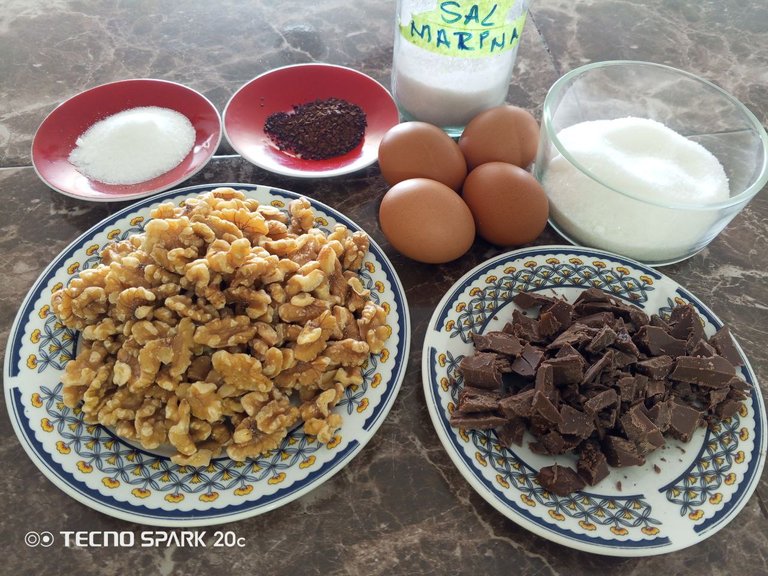
Ingredients:
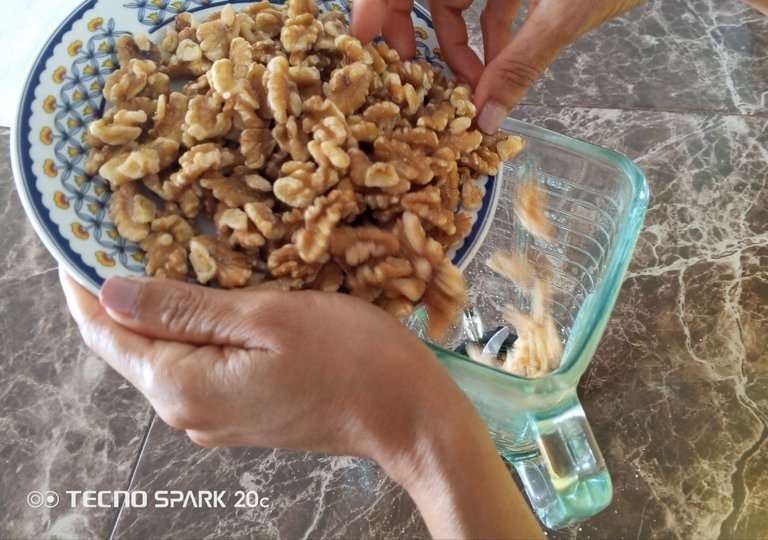
- 200 grams of walnuts.
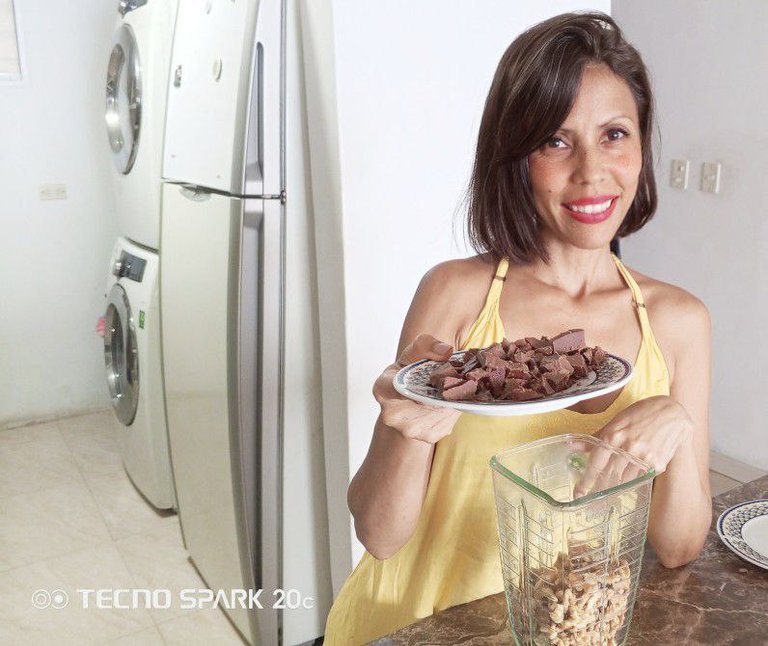
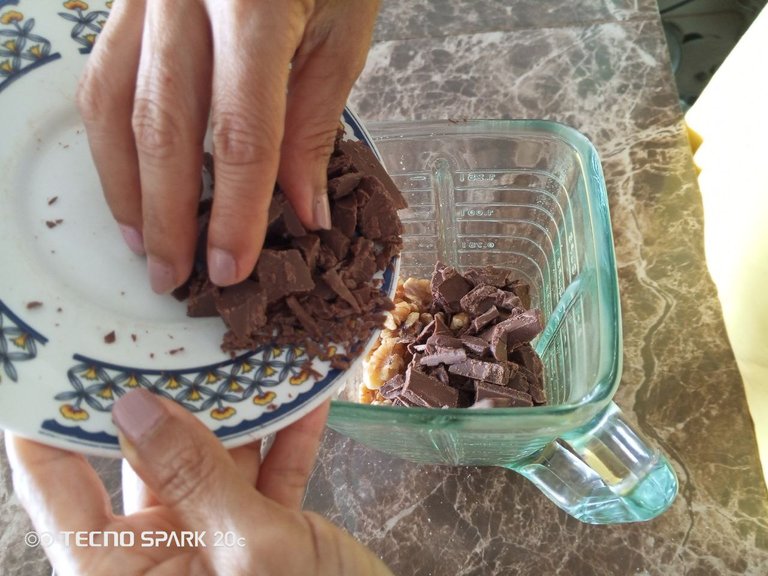
- 100 grams of baking chocolate.
- 200 Grams + 2 Tablespoons of Sugar.
- 2 Tablespoons of Instant Coffee.
- 4 Eggs.
- 1 Teaspoon of Ground Cinnamon.
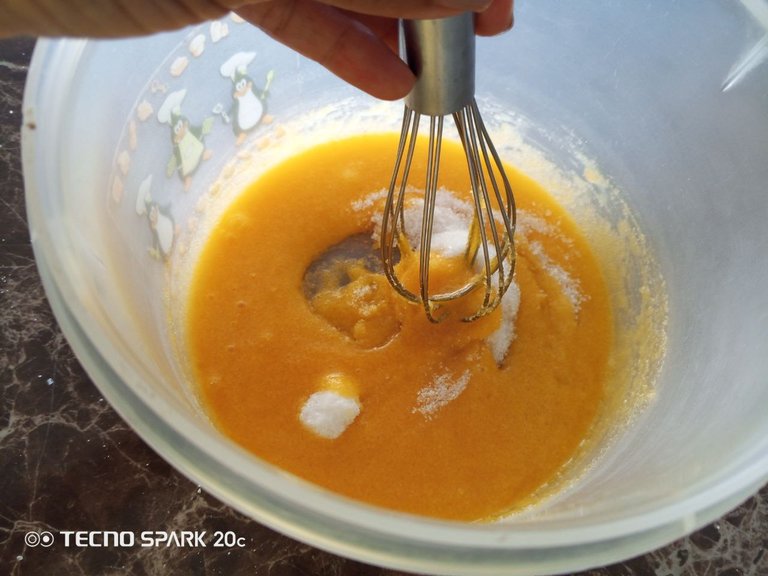
- 1 Pinch of Salt.
- Mold: 20 cm in diameter; I used a rectangular one measuring 22 x 14 cm.
Let's get to the preparation:
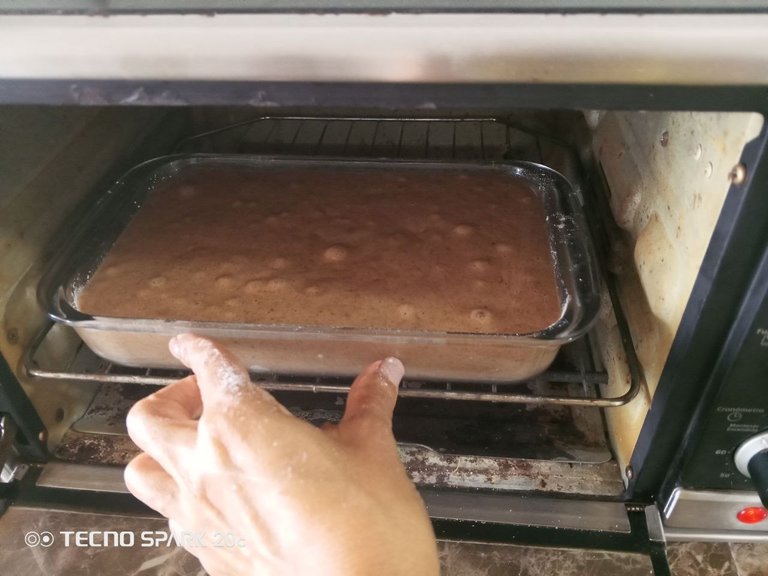
Preheat the oven to 160 degrees.
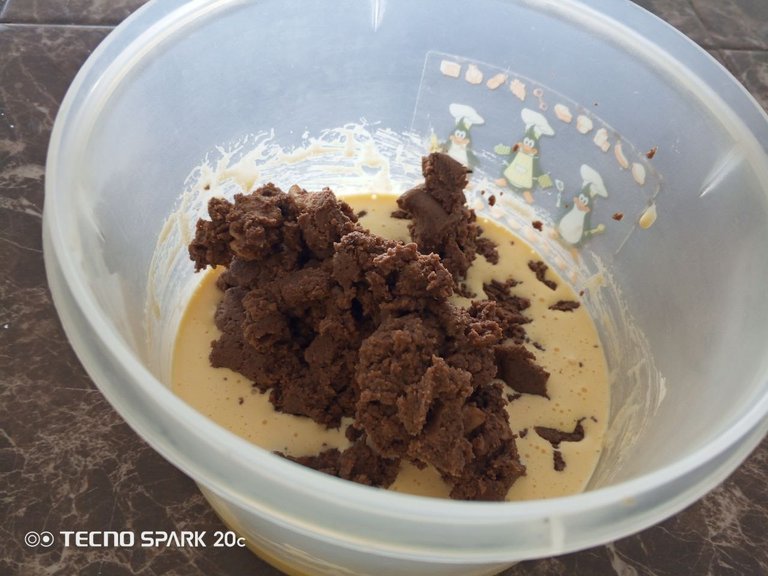
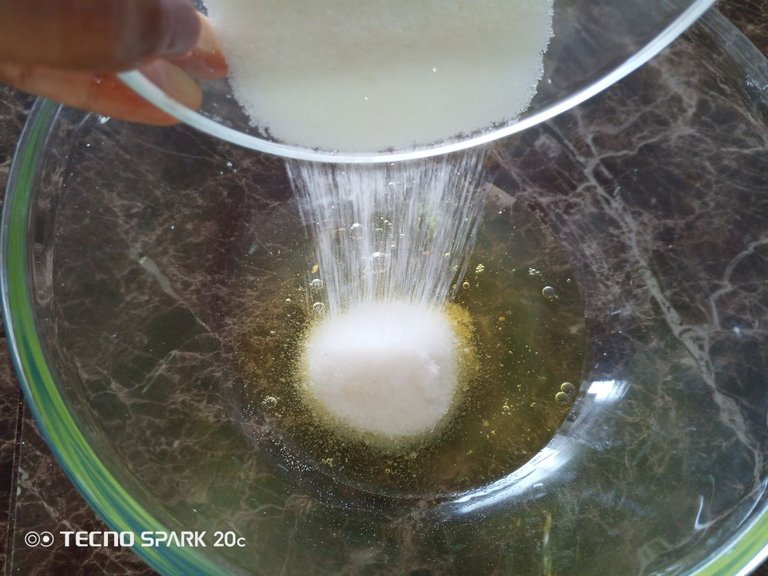
We're going to process the nuts along with the chocolate.
Sugar, Coffee and Cinnamon Powder.

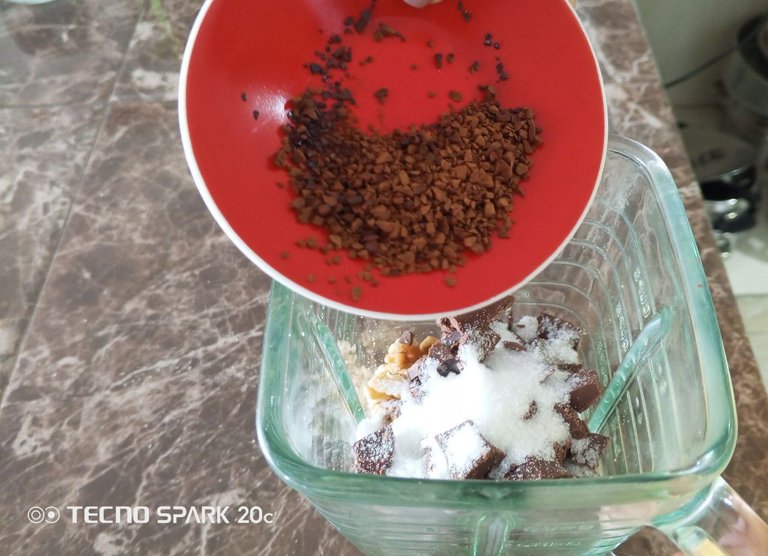
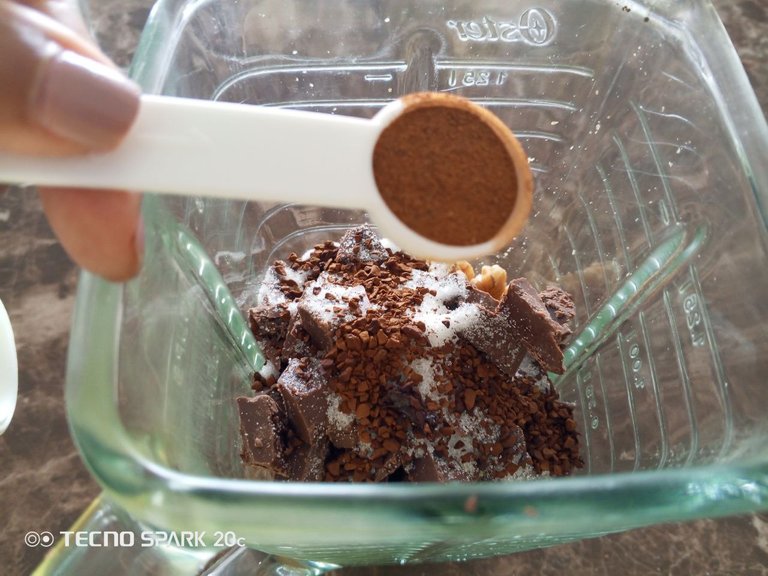
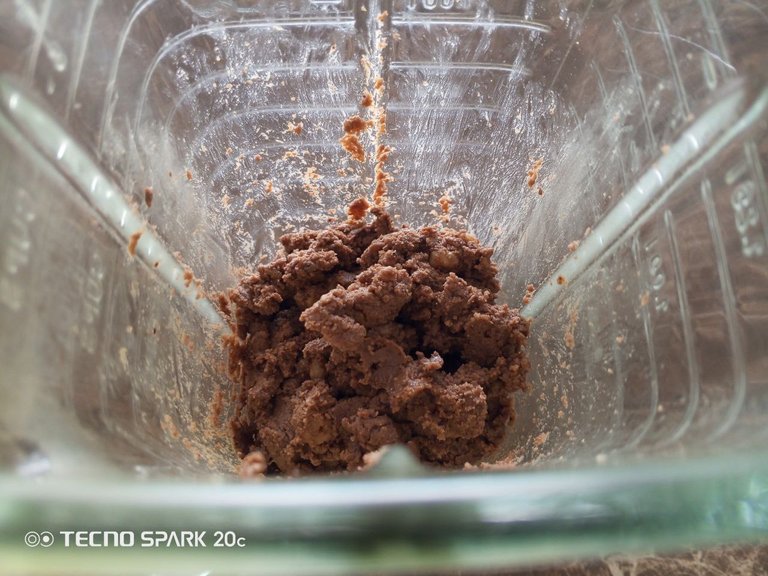
Blend until the mixture has a coarse flour-like texture.
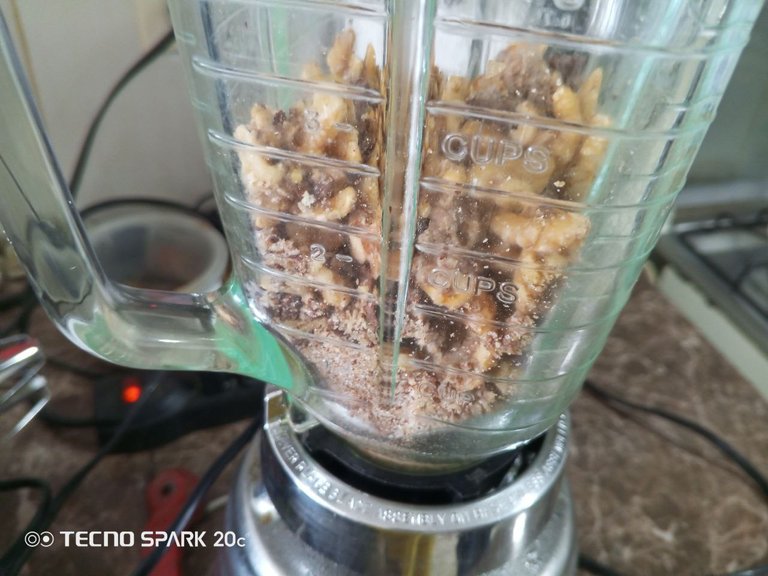
Now, I used a blender to do this, and that's why I ended up with a thick paste instead of flour. I think that's why the original recipe didn't turn out well 😔, so please take precautions.
But that didn't stop me, so I followed all the remaining steps.
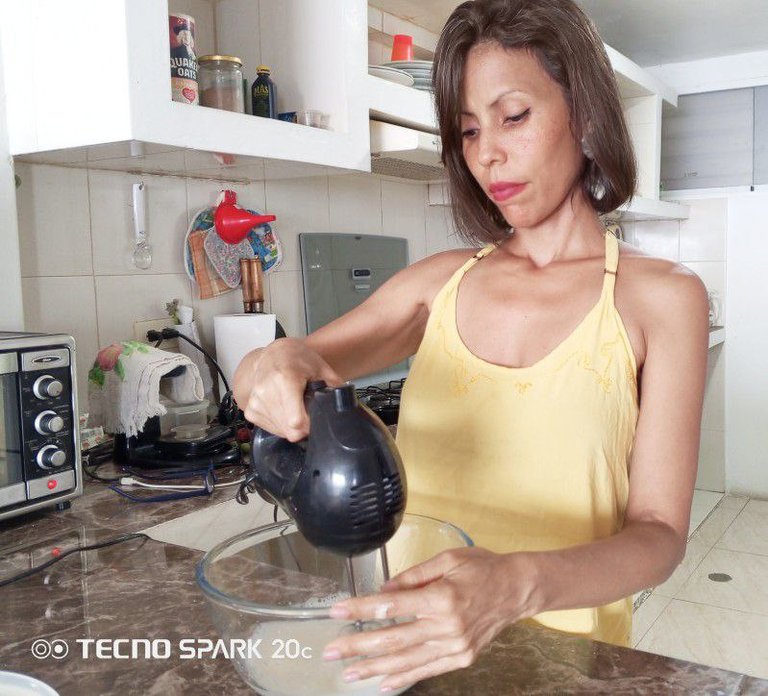
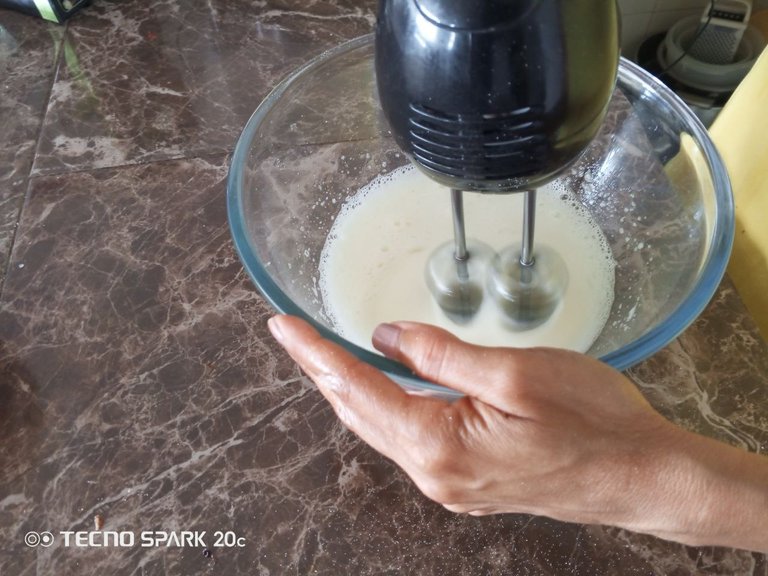
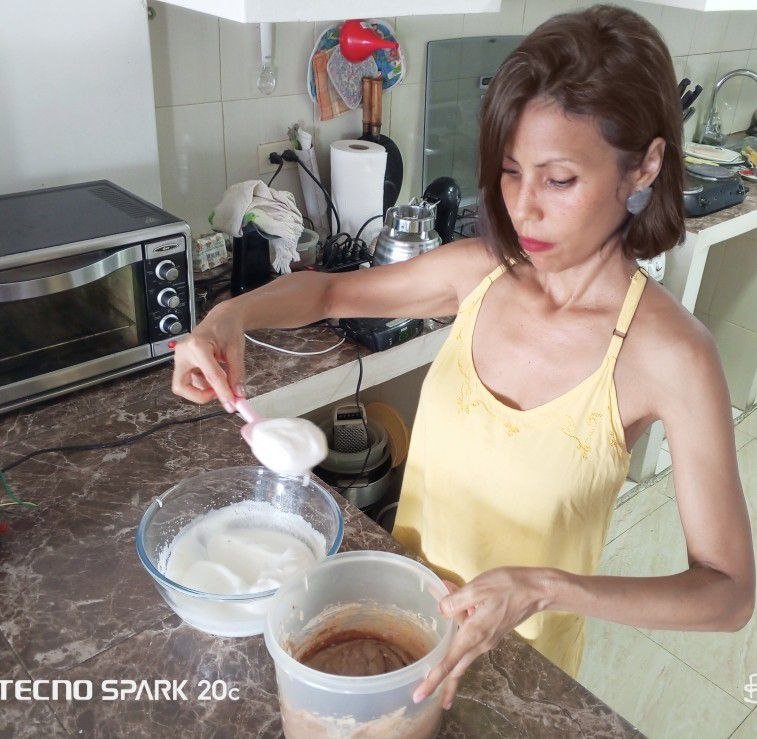
Now in a bowl, add 4 egg yolks with the sugar. Don't add all the sugar, reserving some for the egg whites.
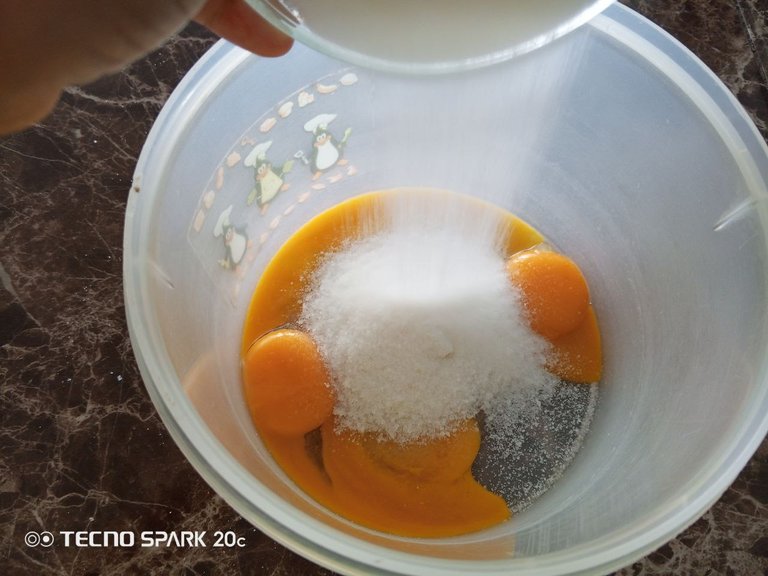
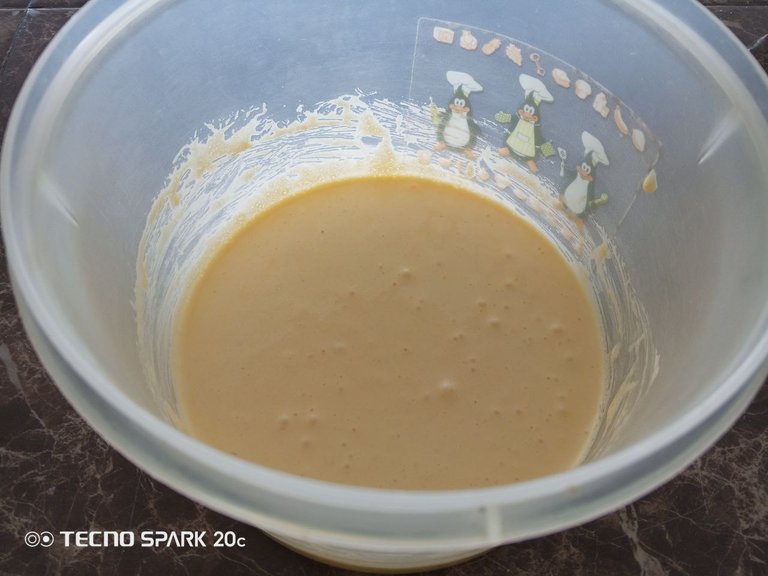
Beat until these ingredients are well combined. You should have a very light yellow mixture.
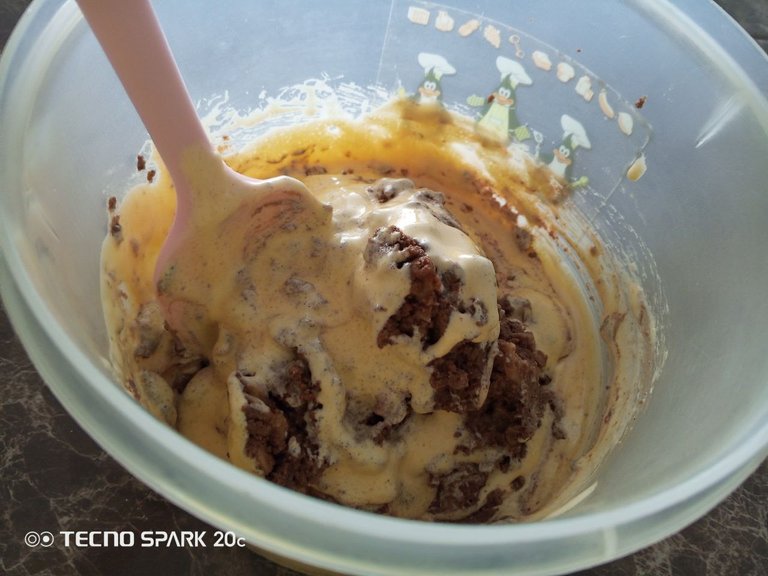
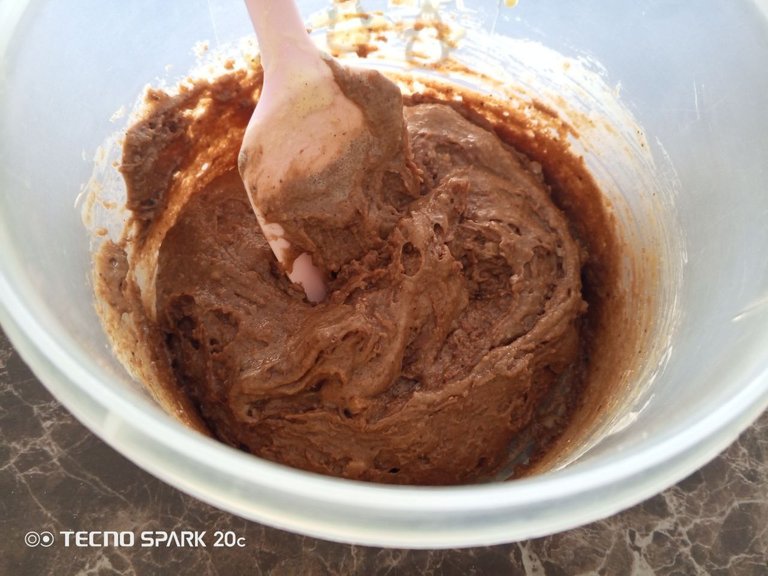
To this mixture we add the ingredients We process it with the nuts and chocolate, mix everything well with a pastry spatula, and set aside.
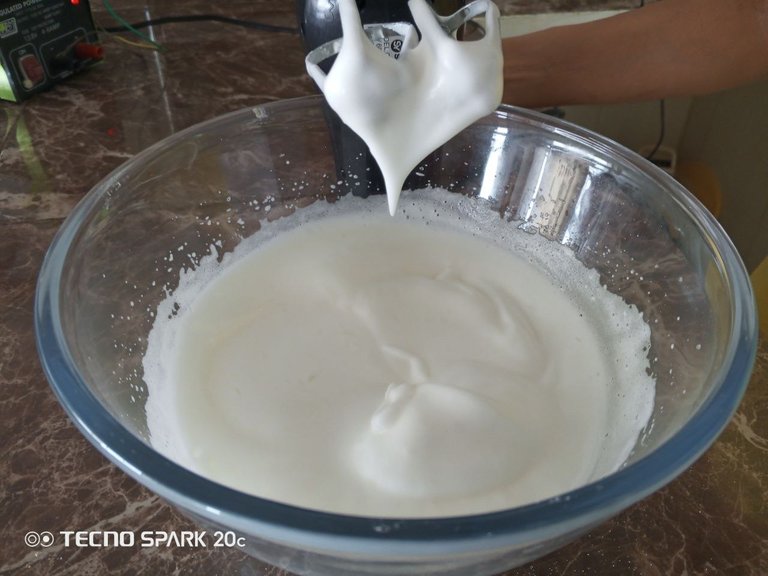
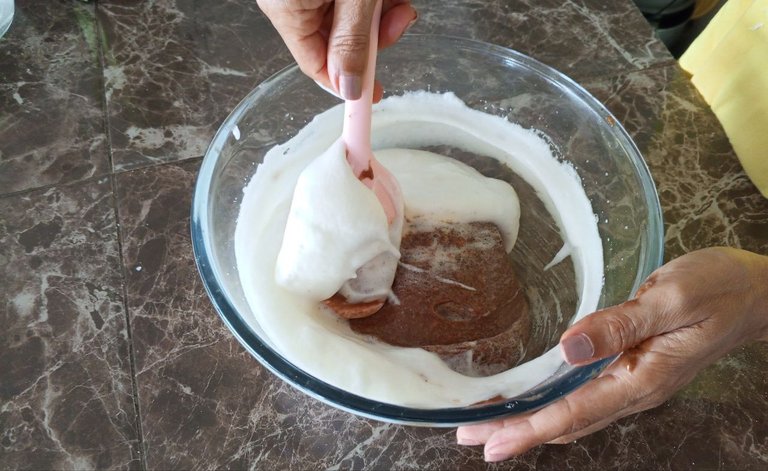
Now let's make our meringue, in a In a bowl, pour the egg whites from the 4 egg yolks we used and add the reserved sugar.
Beat with an electric mixer at high speed until smooth.
Then we'll add a little meringue to the reserved mixture and mix until well combined. This will lighten the mixture.
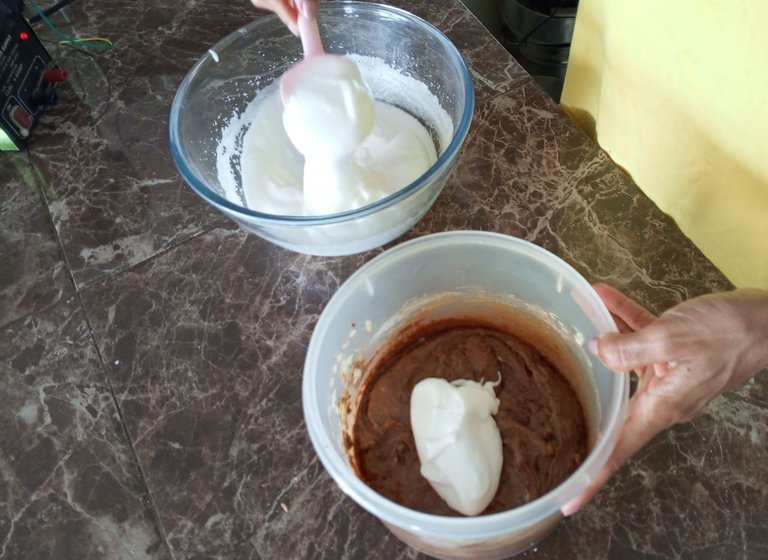
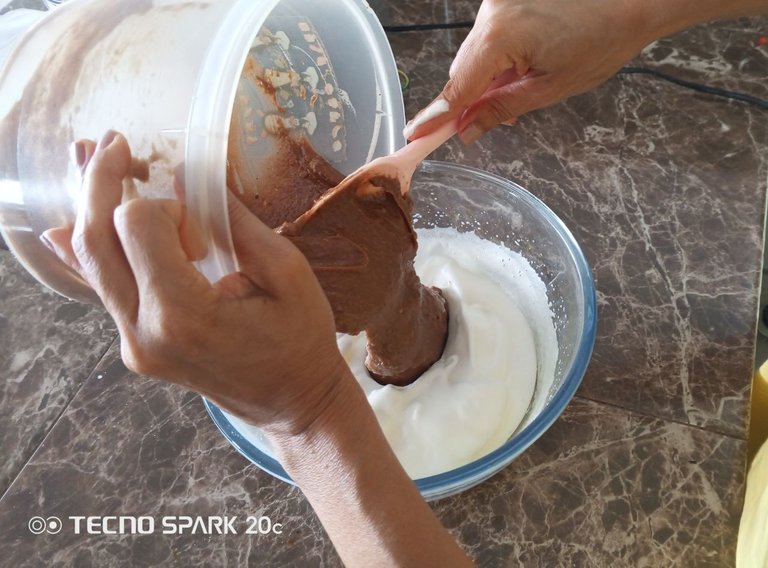
Once this is done, pour the entire mixture directly into the meringue and mix gently, swirling until smooth.
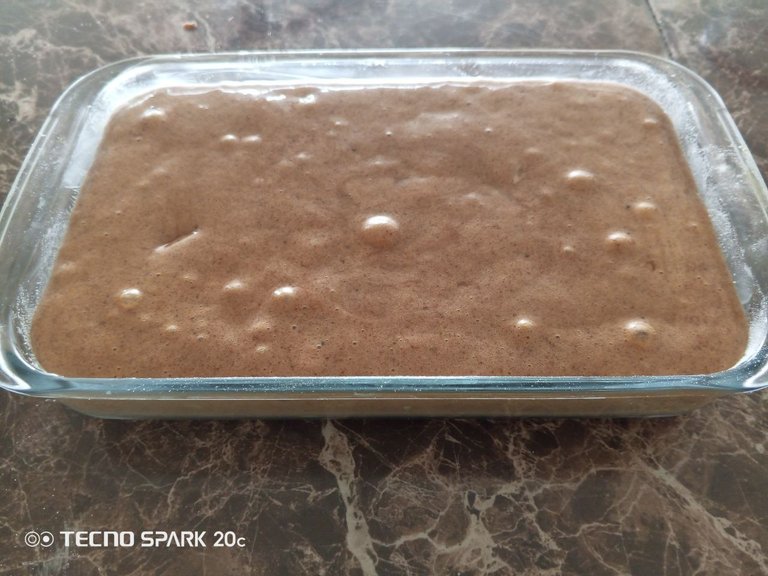
Now we pour the mixture into our previously greased and floured bowl.
Bake for approximately 30 to 35 minutes.
The toothpick is supposed to come out clean when it's ready. Mine never came out dry because the mixture never firmed up; it ended up creamy. I didn't cook it any longer because it might burn.
I took it out of the oven and, as I mentioned in the introduction, it was very crispy on top, but when I cut it, its texture was totally creamy. I was pleasantly surprised when I tried it, as its flavor is still delicious. I think I made a dessert to have in the fridge.
We immediately enjoyed it at home after lunch and it was a success, although it didn't turn out the way I really wanted. I'll try again! 😉
And what do you think? What happened? What did I do wrong? If you know or have an idea, let me know in the comments.
Thank you for your kind company and support, may the Creator bless you generously 🙏


Separators and shapes from Microsoft Word.
Collage used: CollageMaker.
ESPAÑOL.
Saludos apreciados amigos foodie 🤗
Hace un par de semanas estuve viendo una receta por internet que me encantó, fue amor a primera vista porque los ingredientes a usar son de mis preferidos, además no lleva Harina refinada, y la presentación era fabulosa, ¡les estoy hablando de una Torta Moka! 😋
Les confieso que desde el primer momento tenía ansiedad por hacer esta receta, me imaginaba lo deliciosa que podía ser, pero al mismo tiempo pensaba que a lo mejor no me iba a quedar bien y sentía temor en que algo saliera mal y perder los ingredientes que muy costosos están.
Era un presentimiento porque me faltaba el procesador para que la textura de la torta me quedara bien, y no tengo ese aparato, así que pensé que podía ser lo mismo con la licuadora, no estaba segura pero quise intentarlo, se supone que al mezclar algunos ingredientes la textura tenía que salir como migas de pan, pero a mí se me hizo una pasta de Nueces y Chocolate, cuando vi esa textura me desanimé un poco porque en ese momento supe que la receta ya no me iba a salir como la que vi por internet.
No quise parar tenía que continuar, no podía perder los ingredientes, así que seguí adelante, y aunque hice todos los demás pasos igual que la receta original, definitivamente no me salió una torta, ya no era la misma receta.
Eso sí, quedó buenísima, la textura de la superficie es crocante y muy delgada como una deliciosa Galleta muy delicada y frágil, y por dentro me quedó cremosa, a pesar de haberla cocinado lo suficiente nunca se puso firme, pero al probarla quedé enamorada del sabor, ¡esa mezcla de Nueces con Chocolate y café es la locura de delicioso! 😍
El postre no se ve hermoso, pero su sabor es delicioso, y en vez de cortarlo con cuchillo, ¡tengo que servirlo con Cuchara porque es muy cremoso! por eso hoy te muestro la receta, ahora tú tomas la decisión si vas a usar ¿el procesador o la licuadora? por mi parte estoy pensando seriamente en comprar un procesador porque, aunque el Postre quedo muy rico yo quería una torta húmeda pero firme.
Si te interesa la receta te invito a que me acompañes 😉
Ingredientes:
- 200 Gramos de Nueces.
- 100 Gramos de Chocolate de repostería.
- 200 Gramos + 2 Cucharadas de Azúcar.
- 2 Cucharadas de Café Instantáneo.
- 4 Huevos.
- 1 Cucharadita de Canela en polvo.
- 1 pizca de Sal.
- Molde: 20 cms. de Diámetro, yo he usado una rectangular de 22 x 14 cms.
Vamos con la preparación:
Encendemos el horno a una temperatura de 160 grados.
Vamos a procesar las Nueces junto con el Chocolate.
El Azúcar, el Café y la Canela en Polvo.
Trituramos bien hasta que salga una textura como de Harina gruesa.
Ahora bien, yo he usado una Licuadora para hacer este proceso y por eso, en vez de Harina me ha quedado como una pasta gruesa, creo que por eso la receta original no me salió bien 😔 así que tomen sus precauciones.
Pero eso no me impidió seguir, así que seguí todos los pasos que aún faltaban.
Ahora en un recipiente agregamos 4 Yemas de Huevos con el Azúcar, no agreguemos todo el Azúcar, reservamos un poco para las claras.
Batimos hasta integrar muy bien estos ingredientes, nos debe quedar una mezcla de color amarillo muy claro.
A esta mezcla le incorporamos los ingredientes que procesamos con las Nueces y Chocolate, integramos todo muy bien con una espátula repostera, reservamos.
Ahora hacemos nuestro merengue, en un recipiente echamos las Claras de las 4 Yemas que hemos usado y le agregamos el Azúcar que teníamos reservada.
Batimos con un batidor eléctrico a alta velocidad hasta que nos quede una mezcla flexible.
Luego vamos a echar un poco de Merengue a la preparación que tenemos reservada y vamos a mezclar que nos quede bien integrado, eso se hace para aligerar la mezcla.
Una vez hecho esto, echamos toda la preparación directamente al merengue y vamos a mezclar con movimientos suaves y envolventes, esto lo hacemos hasta que nos quede una mezcla homogénea.
Ahora vertemos la mezcla en nuestro recipiente previamente engrasado y enharinado.
Metemos al horno por unos 30 a 35 minutos aproximados.
Se supone que al estar listo el palillo debe salir seco, el mío nunca salió seco porque la preparación nunca se puso firme, quedo cremosa, no lo cociné más porque podía quemarse.
Saqué del horno y como les comenté en la introducción me quedó muy crocante en la superficie, pero al momento de cortar su textura es totalmente cremosa, me lleve una buena sorpresa al probarlo, pues su sabor igualmente es delicioso, creo que me salió un postre para tenerlo en la nevera.
Enseguida lo disfrutamos en casa después del almuerzo y ha sido un éxito, aunque no me salió como realmente deseaba, ¡intentaré de nuevo! 😉
Y tú que piensas, que paso, ¿en qué habré fallado? si sabes o tienes una idea cuéntame en los comentarios.
Gracias por tu amable compañía y apoyo, el Creador te bendiga generosamente 🙏
Separadores y Figuras de Microsoft Word.
Collage Usado: CollageMaker.