Versión Inglés
Greetings dear friends who love good food, how are you? Surely very good, thank God, I am happy to be here again today with a sweet recipe that I made to share at Christmas, although I must confess that the snowfall did not turn out as I expected, but it tasted good, here is my recipe.
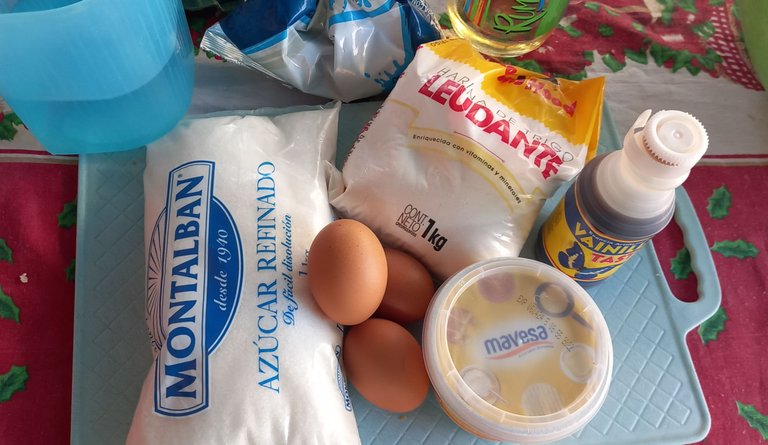
Ingredients:
- 1/2 self-rising wheat flour
- 4 eggs
- 1/2 milk
- 125 grams of butter
- 2 cups of sugar
- 1 teaspoon of rum
- teaspoon vanilla
- A pinch of salt
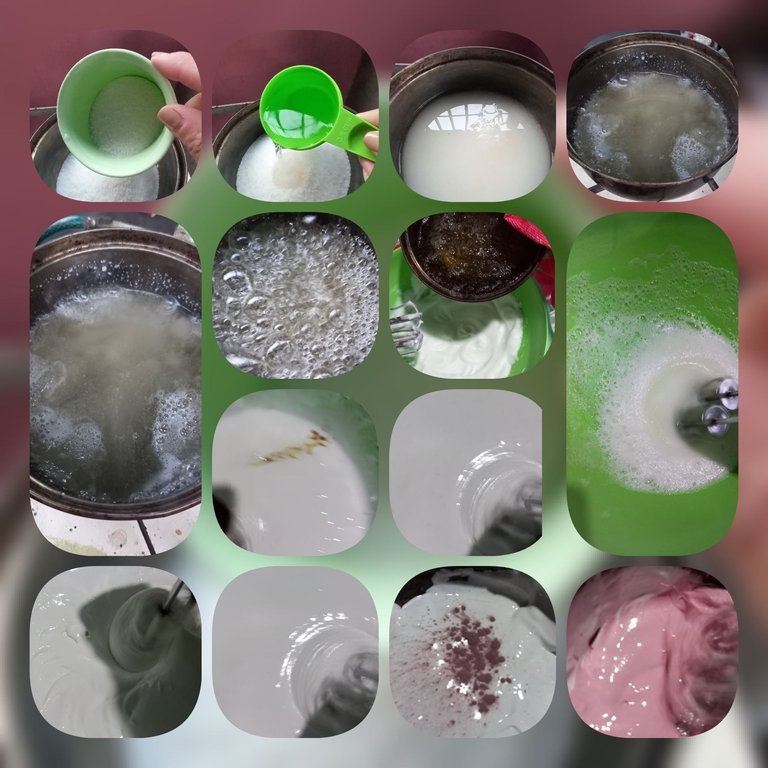
For the snowy one - 2 egg whites
- 1 and 1/2 cups of sugar
- 1/3 cup of water
- 1/2 teaspoon vanilla
Preparation:
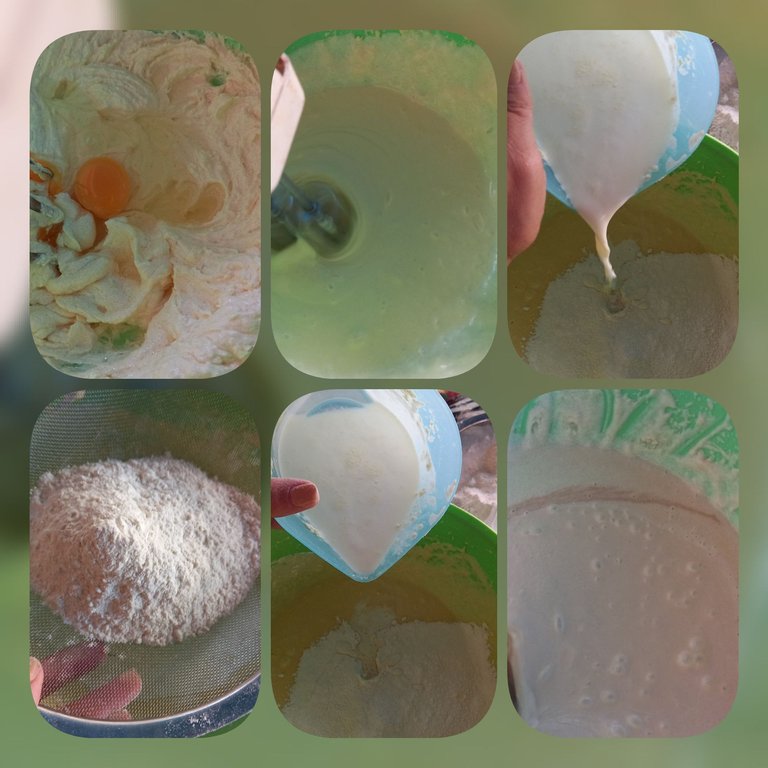
We begin by adding room temperature butter to a bowl and beating until creamy, then we add 2 cups of sugar and continue beating with the mixer until the cream changes color.

Then add the eggs little by little, beating until all the ingredients are integrated, continue adding the previously sifted wheat flour, with a pinch of salt, mix and then add the milk, add the rum and vanilla, continue beating until you obtain a homogeneous mixture.
In a previously greased and floured mold, pour the mixture and place in the oven for 1 hour.
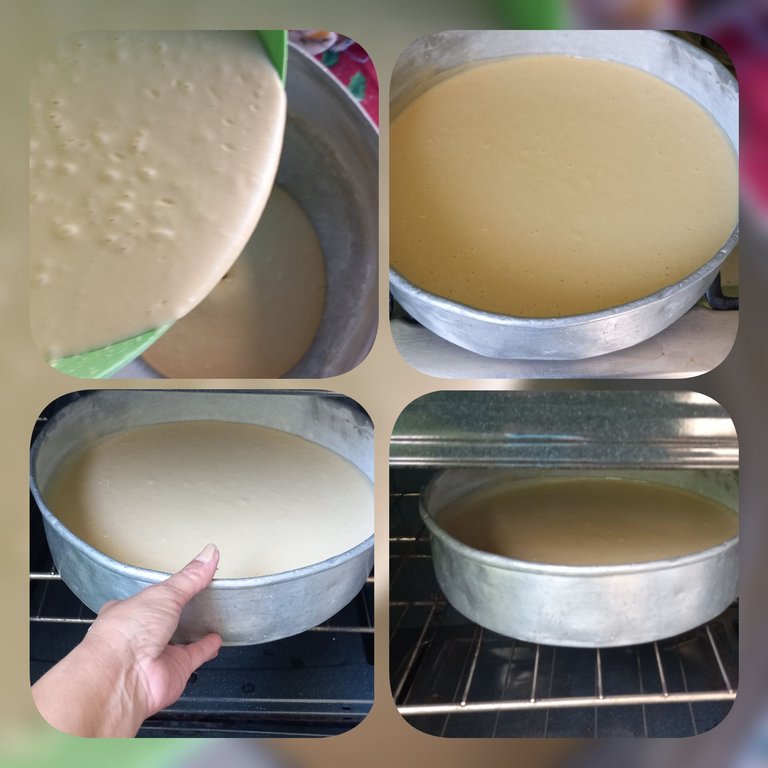
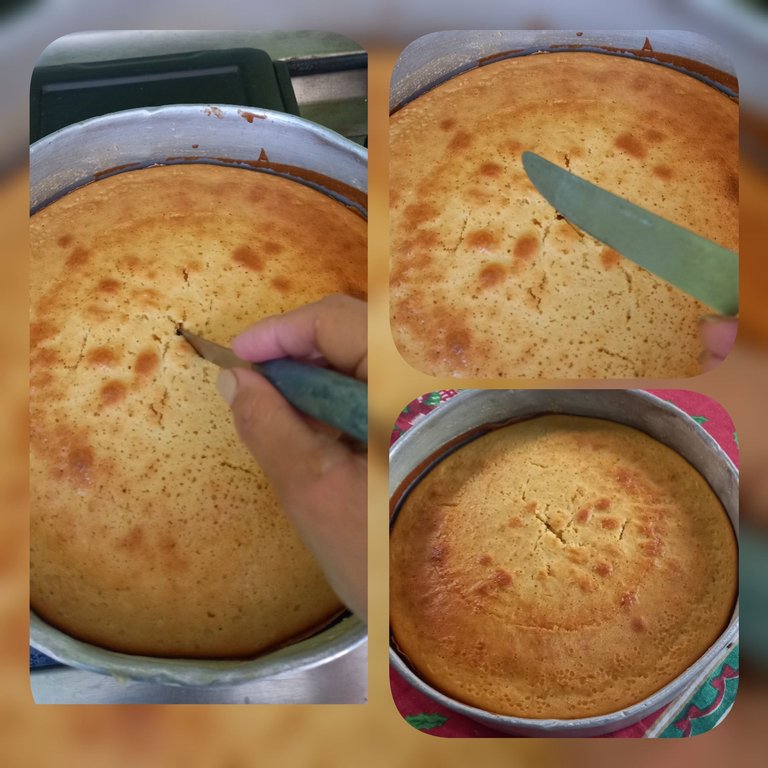
Remove from the oven when golden brown and if a toothpick or knife is clean by the meter, let it cool to room temperature and unmold.
For the snowy one:
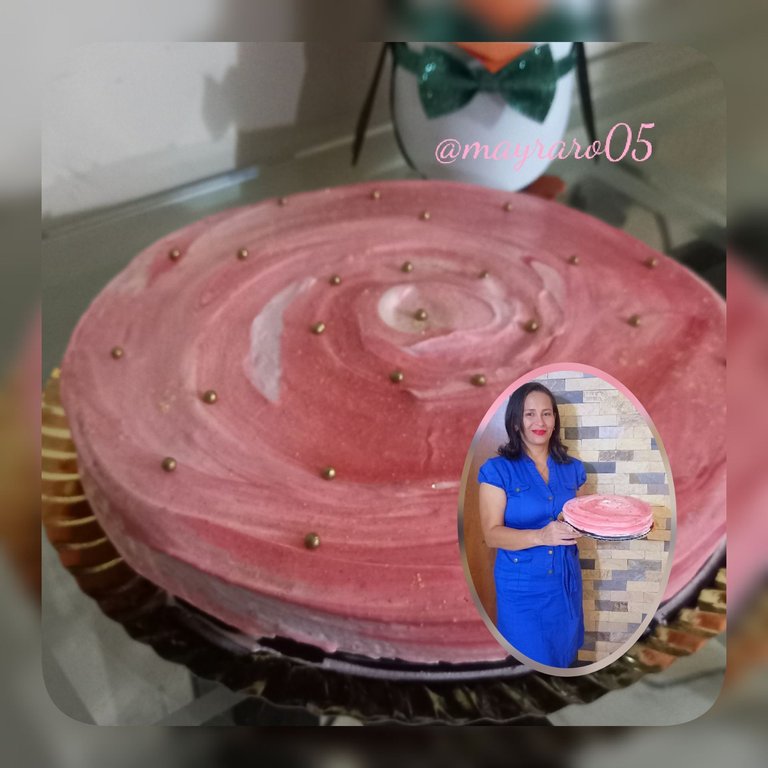
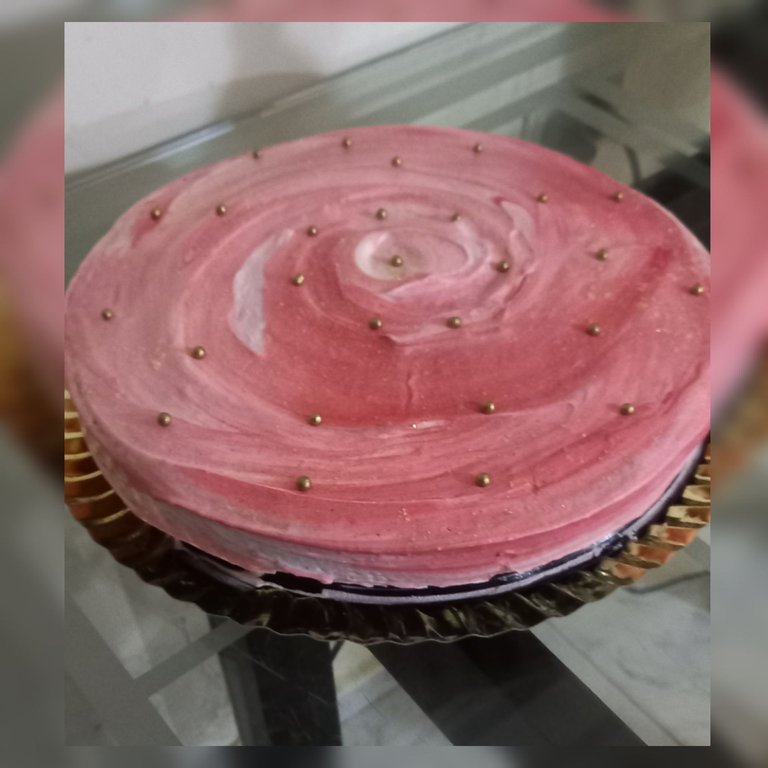
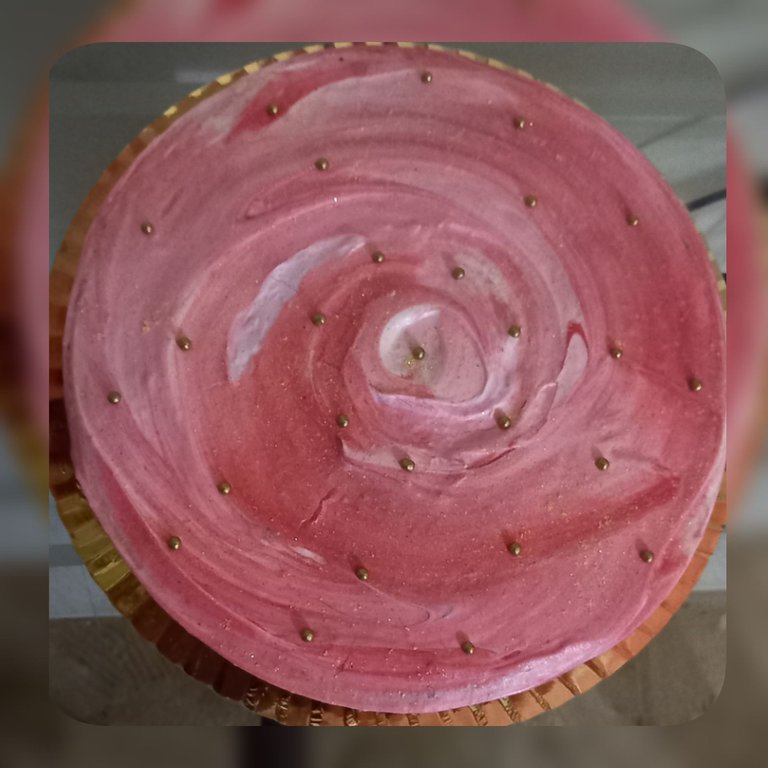
In a pot, place the sugar and water over low heat, let it cook until it begins to bubble and then make threads with the honey. Previously, begin to beat the egg whites until they form a stiff peak, add the honey and continue beating. for a few more minutes, finally add the vanilla and mix well until you obtain a smooth cream, add artificial coloring if you wish, I had pink which was the one to use.
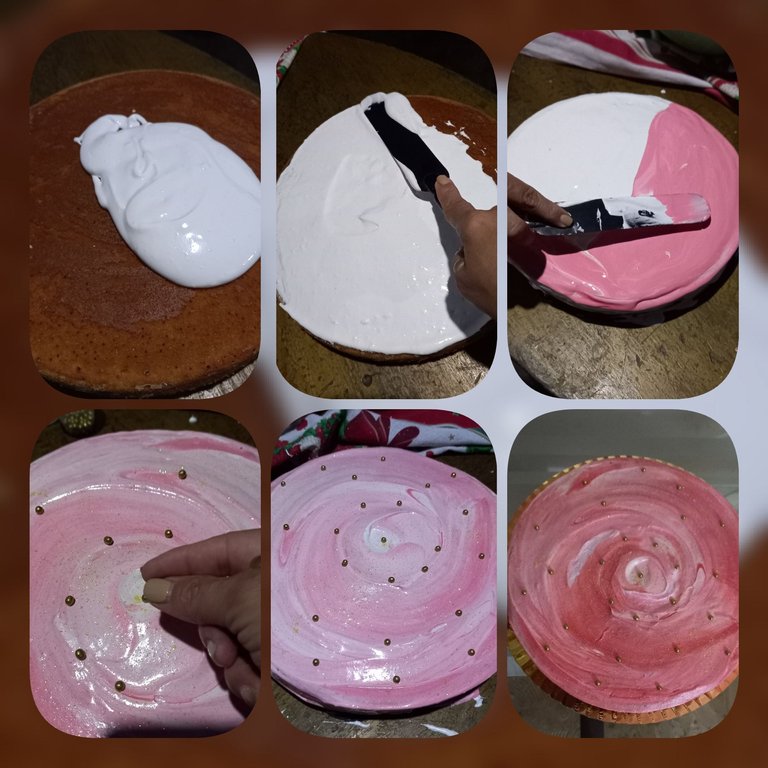
To decorate the cake, pour the white cream on top and then add pink color, mixing gently with circular movements and as a special touch I remembered to have some golden pearls saved.
The photographs are my own, taken with my Samsung A 12 mobile phone.
Converted text with Google translate
English Español (Click here!)
Saludos queridos amigos amantes de la buena comida, como están? Seguramente muy bien gracias a Dios, me alegra estar aquí de nuevo hoy con una dulce receta que hice para compartir en navidad, aunque debo confesar que el nevado no me salió como lo esperaba, pero estaba bueno de sabor, acá mi receta.
Ingredientes:
- 1/2 de harina de trigo leudante
- 4 huevos
- 1/2 de leche
- 125 grs de mantequilla
- 2 tazas de azúcar
- 1 cucharadita de ron
- cucharadita de vainilla
- Una pizca de sal
Para el nevado - 2 claras de huevos
- 1 taza y 1/2 de azúcar
- 1/3 taza de agua
- 1/2 cucharadita de vainilla
Preparación:
Comenzamos agregando en un bolw mantequilla a temperatura ambiente y batir hasta obtener una crema, luego agregar 2 tazas de azúcar y seguir batiendo con la batidora hasta que la crema cambie de color.
Luego agregar los huevos poco a poco, batiendo hasta integrar todos los ingredientes, continuar agregando la harina de trigo previamente tamizada, con una pizca de sal, mezclar y luego agregar la leche, añadir el ron y la vainilla seguir batiendo hasta obtener una mezcla homogénea.
En un molde previamente engrasado y enharinado, verter la mezcla y llevar al horno por 1 hora.
Retirar del horno al estar dorada y si al meter un palillo o cuchillo esté salga limpió, dejar enfriar a temperatura ambiente y desmoldar.
Para el nevado:
En una olla colocar el azúcar y el agua a fuego lento dejar cocinar hasta que comienze a burbujear y luego que se hagan hilos con la miel, previamente comenzar a batir las claras de huevo hasta formar un punto de nieve, agregar la miel, seguir batiendo por unos minutos más, por último agregar la vainilla y mezcla bien hasta obtener una crema suave, agregar colorante artificial si lo deseas, yo tenía rosa que fue el que utilice.
Para decorar la torta verter la crema blanca por encima y luego añadir color rosa mezclando suavemente con movimientos circulares y como toque especial recordé tener guardadas unas perlitas doradas.
Las fotografías son de mi autoria tomadas con mi teléfono móvil Samsung A 12.
Texto traducido con el traductor de Google